The 2025 Ford Bronco Sport Sasquatch, whether it’s the Outer Banks or Badlands trim, is designed with off-roading in mind and one of the awesome features now offered is four auxiliary switches. Just as in the Bronco, now there is an option to have these switches at your fingertips in the Sport, that allow you to control your aftermarket lights and other accessories without having to run wires through the firewall.
Here’s my guide to accessing these switches, locating the wiring, and understanding the wire colors to help you set up your accessories. When we received our Rebelle Rally Bronco Sport Sasquatch, it was still a pre-production, so we ran into a few challenges, mostly in locating and accessing the wiring. Once we figured that out, the rest was straightforward.

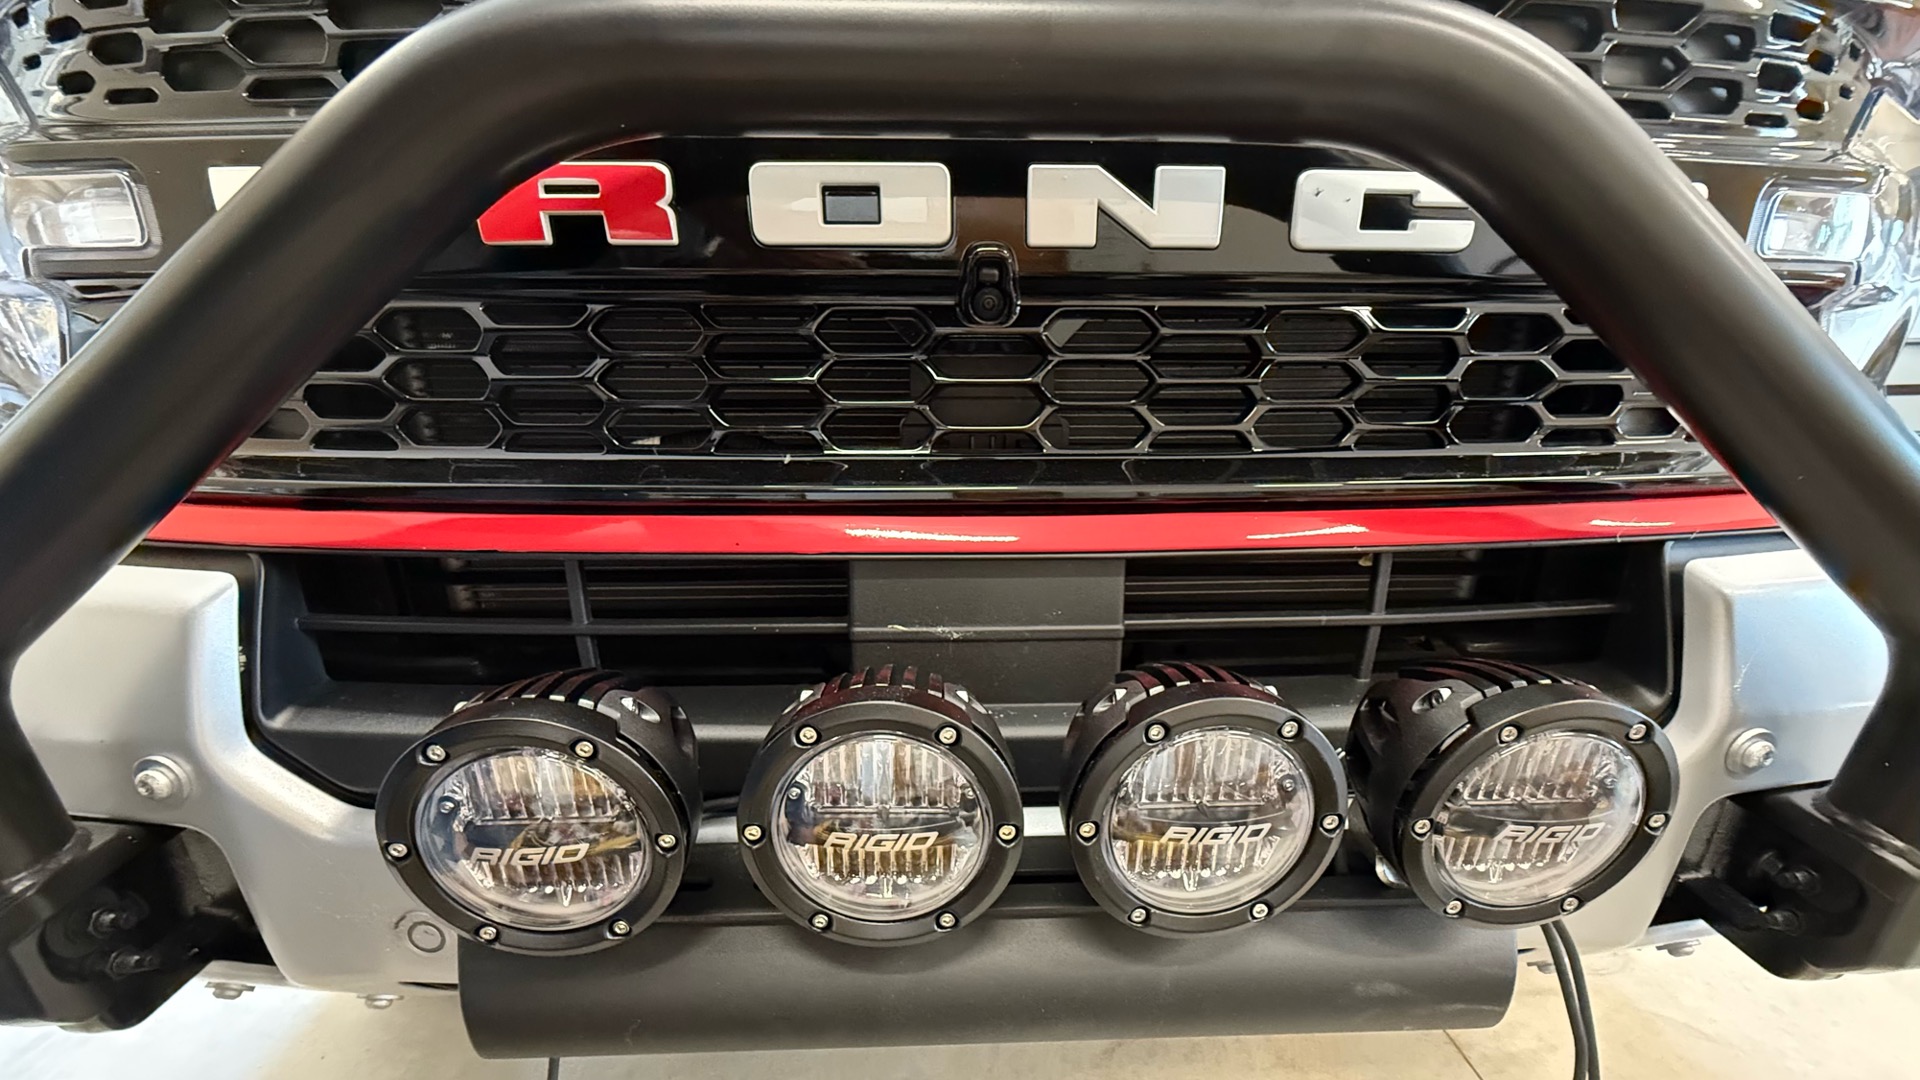
Our project included installing a Rigid Lightbar to the Trailrax roof rack, four Rigid Pod lights below the front nudge bar, and a horse whinny horn just for fun. Before you start your project, Ford does offer a few warnings to consider in their manual under the heading Auxiliary Switches (if equipped):
- Do not exceed the total weight capacity of the vehicle or of the front or rear axle.
- It is your responsibility to make sure any equipment complies with local legislation.
- An authorized dealer needs to install mobile communication systems.
- If you or an authorized dealer add any electrical or electronic accessories or components not produced by us to your vehicle, you may adversely affect battery performance and durability. In addition, you may also adversely affect the performance of the other electrical systems in the vehicle.

How to Use the Bronco Aux Switches
Step 1: Locating the Auxiliary Switches
The auxiliary switches in the 2025 Bronco Sport Sasquatch are located in the overhead console, just above the rearview mirror. These switches are pre-wired for easy access, allowing you to connect various accessories, primarily after-market lighting without cutting into the vehicle’s wiring harness.
- Number of Switches: The Bronco Sport Sasquatch comes with four auxiliary switches, compared to six in the Bronco. (insert photo of switches).
- Switch Ratings: Each switch has a different amperage rating to accommodate various accessory power needs. Ratings are as follows:
- Switch 1: 30 amps
- Switch 2-4: 10 amps
If your accessory amperage draw is close to this rating, consider adding relays.

Step 2: Locating the Pre-Wired Auxiliary Leads
Finding these weren’t so easy. D is located in the engine bay as expected but A-C are actually located in the wheel well behind the liner. The diagram without any explanation was challenging on my part, I spent some time searching and hoping that it was not where it turned out to be. To a lesser extent, Ford substituted letters for the auxiliary numbers, but our assumption was A=Aux 1, etc.
Our liner is plastic, and we were able to remove a couple of the securing clips and by carefully folding it back to expose the wires, we did not have to completely remove the liner but we did have to remove both front tires. (Use jack stands and extreme caution when working in this area!) After completing the connection, we were easily able to pass the wires up and into the engine bay to connect to the battery.
Step 3: Understanding Wire Colors and Functions
Each auxiliary switch is connected to a specific wire, making it easy to match the switch to the accessory you want to control. Below is the color code for the auxiliary wires per the manual:
- Aux 1 (30 amps): Yellow, Roof light bar
- Aux 2 (10 amps): Green/Brown, Front end lights
- Aux 3 (10 amps): Violet/Green, Pod lights LH
- Aux 4 (10 amps): Brown, Pod lights RH
There is no other labeling to identify these wires, but they matched up well with the drawing so once we got access behind the wheel well liner, it was straightforward although a bit tight for big hands.

Step 4: Connecting Your Accessories
- Plan Your Setup: Determine which accessories you’ll connect to each switch based on the amperage requirements. We were a bit concerned that our lights would draw too much power, so we elected to run relays for everything but the horn which is very low power.
- Run Wiring to Accessories: Route wires or wiring harness from your light mounting points (e.g., roof rack, bumper) to the connection locations.
- Connect to Auxiliary Wires: Use butt connectors or soldering to join your accessory wires to the corresponding auxiliary wires. We performed a quick test to ensure we were connected to the correct auxiliary switch before final connection.
- Secure Connections: Wrap connections with heat-shrink tubing or electrical tape for protection against moisture and vibrations.
- Organize Your Wiring: Make sure all your wiring is labeled for easy identification, remove excess wire length, and secure your wiring. I labeled my horn, Aux 4, as an eject button, much to the amusement of my co-driver.
- Test the Setup: Turn on the auxiliary switches in the overhead console to ensure the accessories are working properly. Take a test off-road and expose the wiring to the bumps and vibrations before you really need the lights and adjust as needed.

Why the Auxiliary Switches Are a Game-Changer
The pre-wired auxiliary switches in the 2025 Bronco Sport Sasquatch eliminate the need for aftermarket switch panels, which require extra labor and time.
Whether you’re adding extra lighting for night trails or cutting through dust and silt, or even to just enjoy your aftermarket horn, this is a job that can be done easily in your garage. You’ll have your accessories at your fingertips in no time.
With the right preparation and this guide, you’ll be ready to customize your Bronco Sport Sasquatch for any adventure!

Comments
You must log in or register to post here.