
If you’re cruising across I-70 through Colorado on your way to Moab or headed west toward Sand Hollow State Park, there’s an easy and rewarding detour worth adding to your route, an all-Bronco-friendly trail ride through the rock-art-rich public lands surrounding Rangely. Also, if you’re planning on attending Bronco Safari in Vernal, you’ll likely drive right by this area. It’s worth a minor detour.
Just about an hour north of Loma, near the Utah border, the scenic drive along Colorado State Highway 139 opens the door to remote mesas, dramatic canyons, and some of the most accessible rock art sites in northwest Colorado.
Brian and I loaded up the Bronco, brought the dogs, and explored this area in December, 2025, and aside from one other vehicle, we had the entire off-pavement route to ourselves.
Before You Go: Timing and Conditions Matter
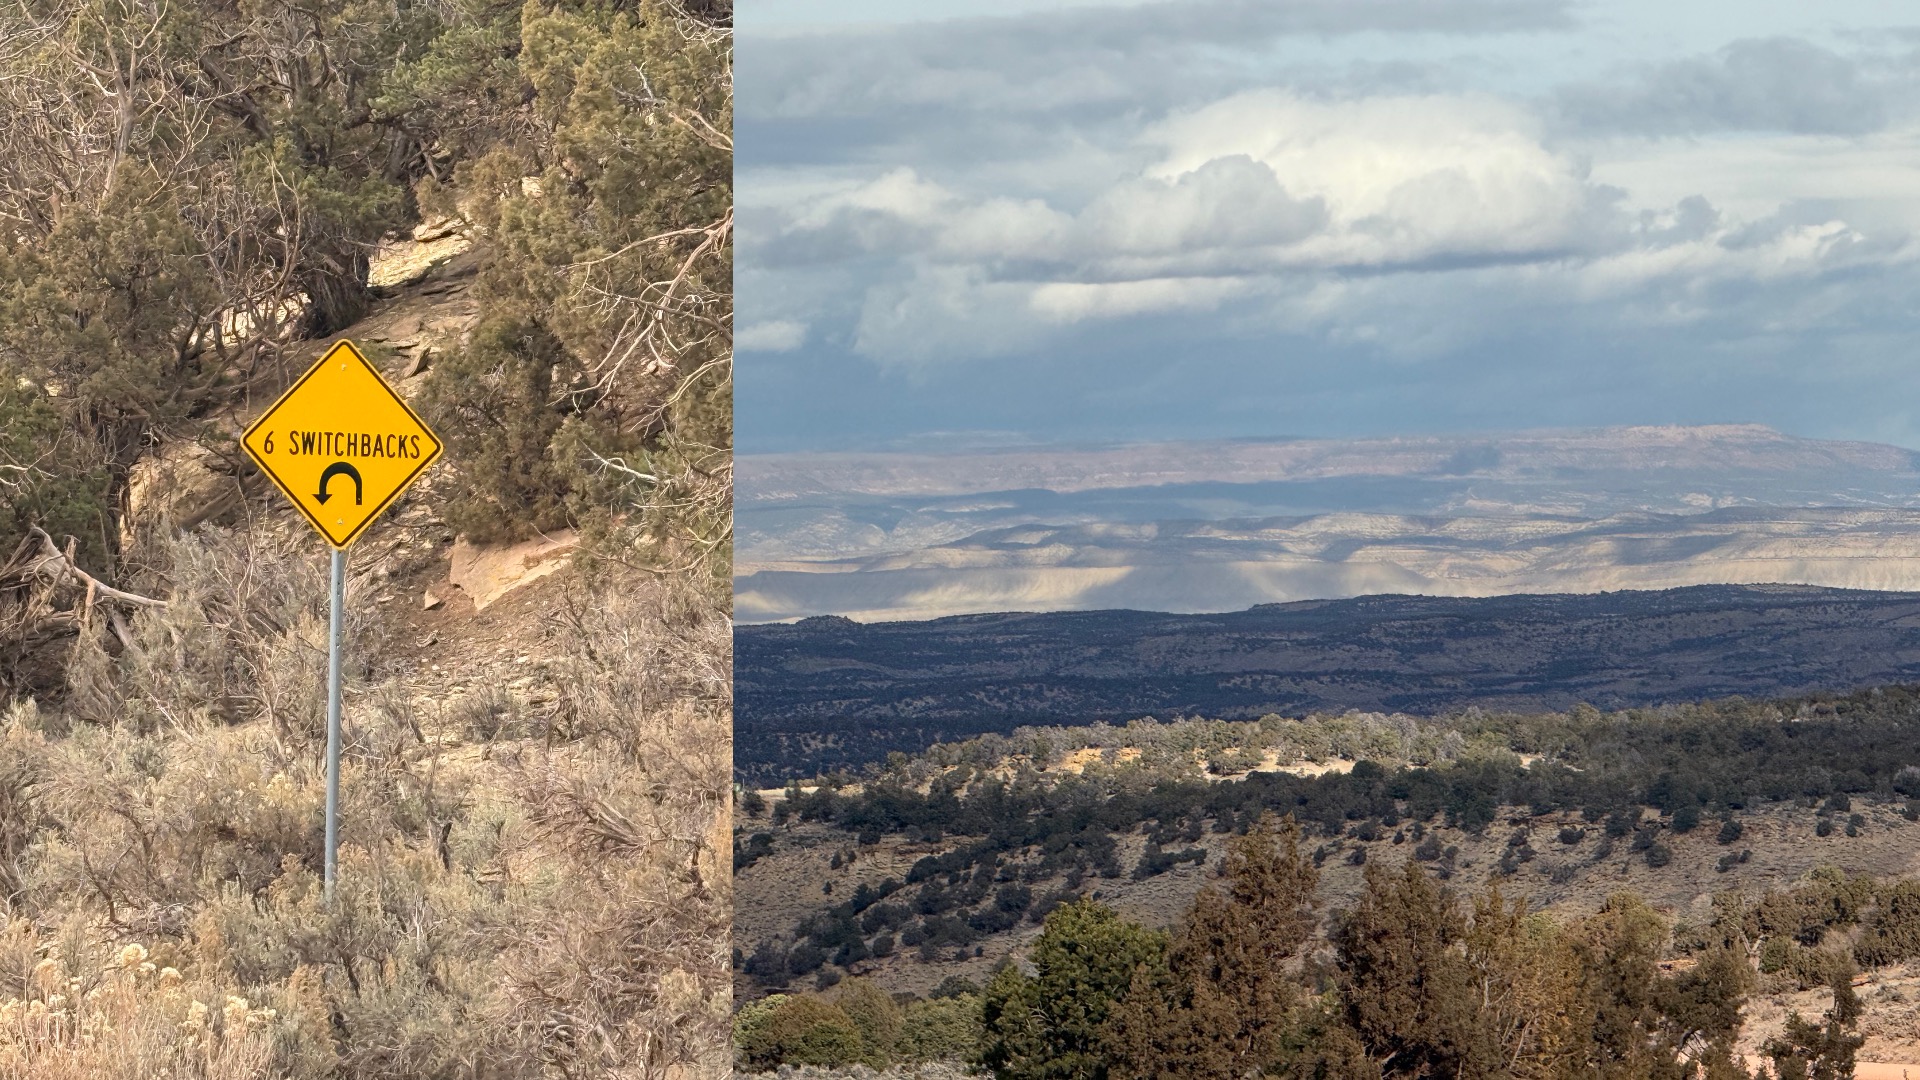
This route is ideal for any Bronco or Bronco Sport in dry conditions, but weather is a major factor. Snow or wet weather can make some of these roads impassable, and the steep mountain switchbacks near the end of the loop are not a place you want to test traction. Check the forecast carefully and be prepared to turn around if conditions change.
Starting Point: Canyon Pintado South
We began our day at the Canyon Pintado South Orientation Site, a well-maintained picnic area with restrooms and excellent interpretive signage explaining the region’s rock art history. It’s a perfect place to get oriented before heading out.
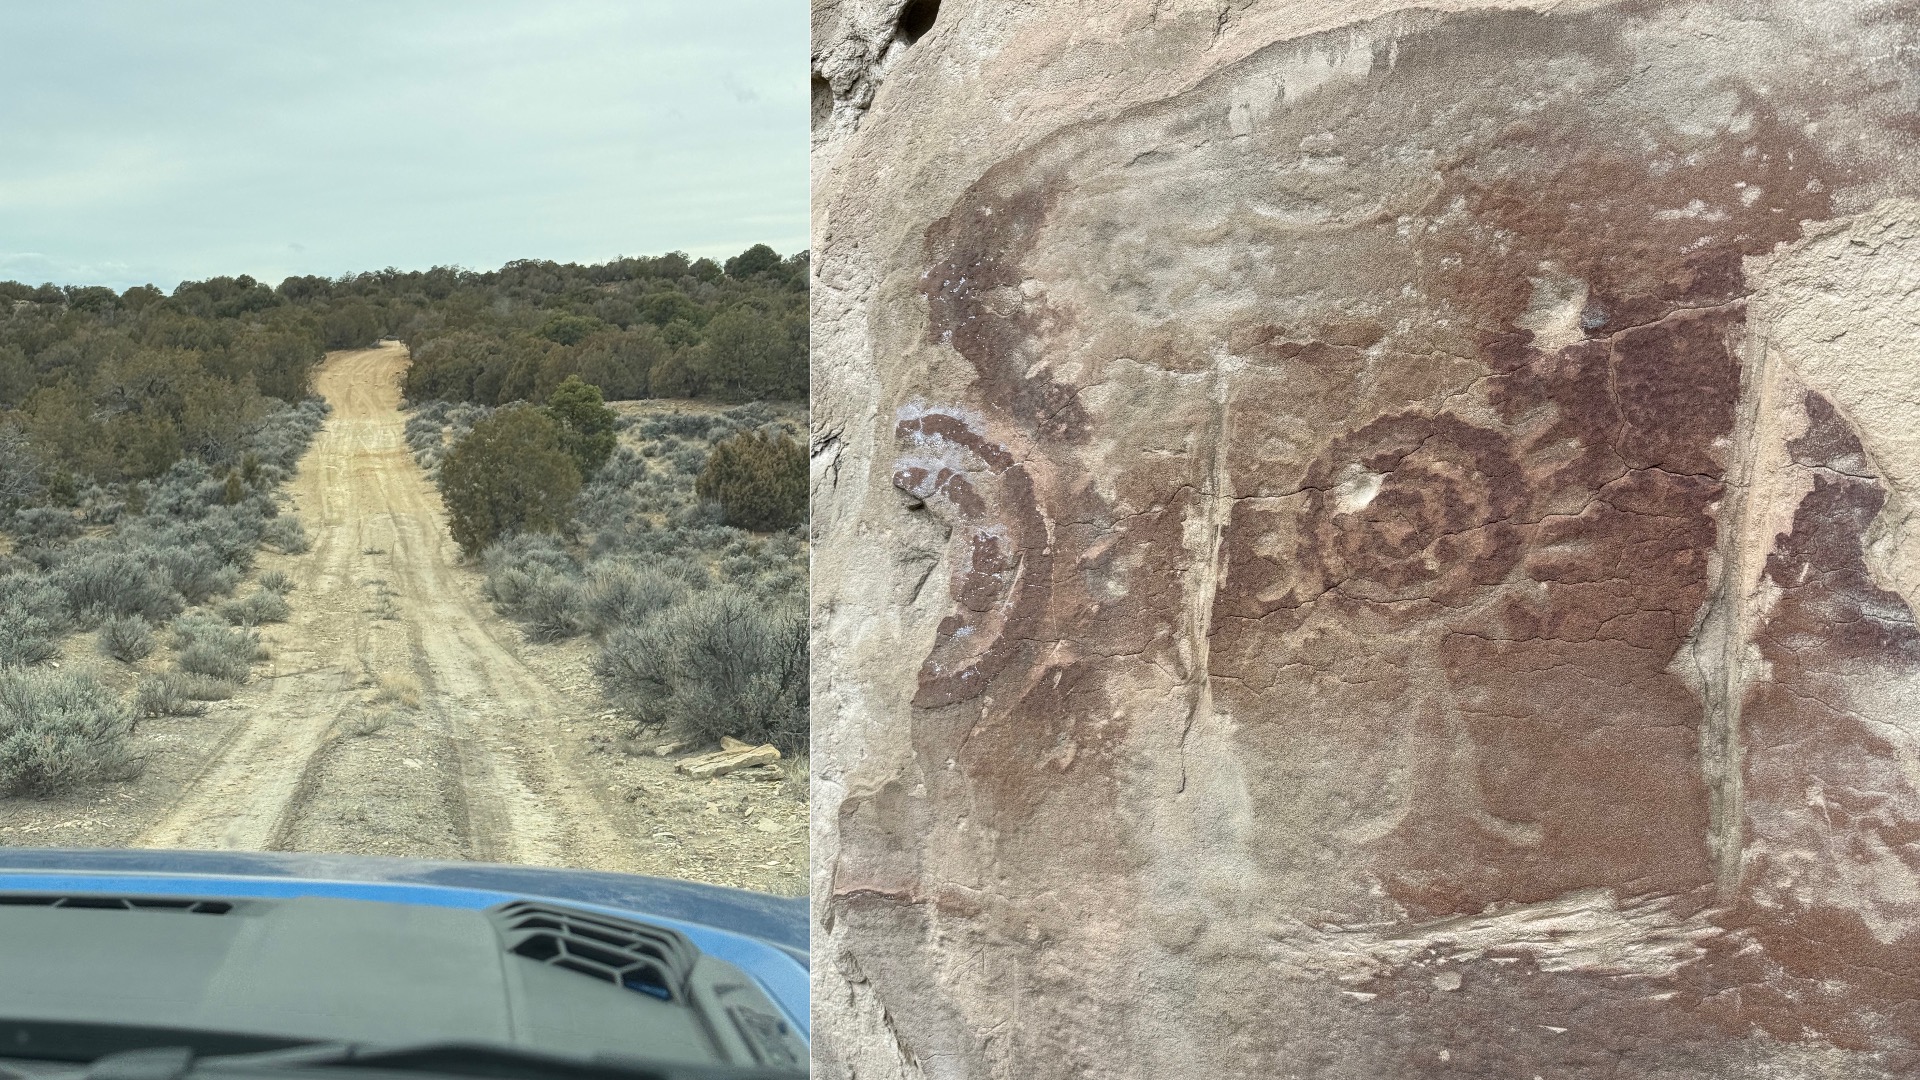
From there, cross the pavement and head onto unpaved Road 116. This wide, scenic road passes through oil and gas infrastructure and can feel confusing at first due to multiple side roads. Stick to the most traveled route.
After several miles, you’ll reach a Y-intersection forcing a choice between Road 111 and Road 113. We went right onto 113, marked “Travel at Your Own Risk.” While rougher, it’s still easily navigable in your Bronco or Sport and adds to the sense of adventure. Stay on 113 until it intersects with Dragon Trail Road—turn right here.
Rock Art Sites Along Dragon Trail
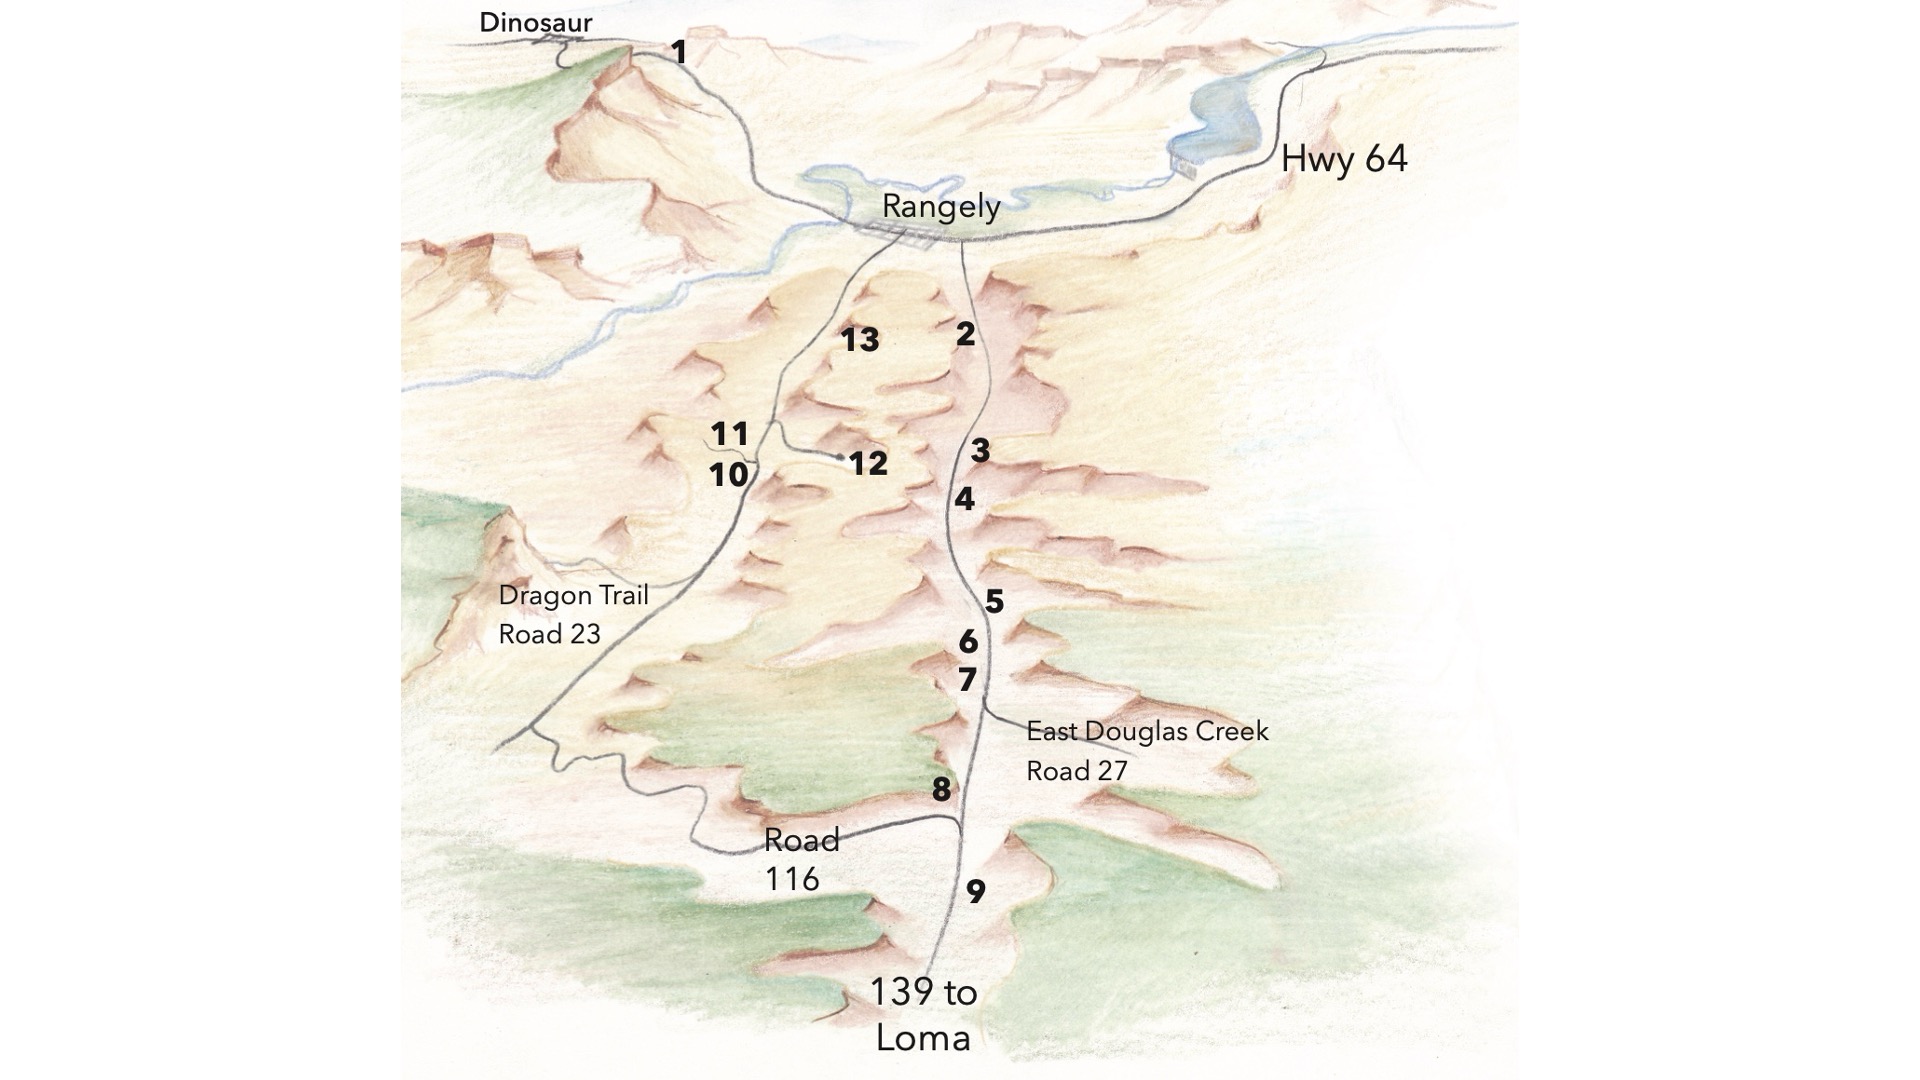
Using a poorly drawn map and site descriptions, we focused on sites 10, 11, 12, and 13 first, then looped back to hit sites 6, 7, and 8 along Highway 139. Despite what some online descriptions claim, every site we visited had large metal signs—though many written directions are inaccurate and I've attempted to correct them here, although there is something to be said for being a little lost, it's part of the adventure.
For those of you wondering exactly what rock art is, it’s a generic description that encompasses two primary types of drawings, petroglyphs and pictographs. I hesitate to describe these pictures as writing, because no one is exactly sure what is being communicated because the artists disappeared long ago. The Fremont people tended to make the petroglyphs, which is pecking with tools into the rock. These are between 800-1100 years old and the older pictographs or painted images, described as Barrier Canyon style were created over 2,000 years ago, and some say even older. We also saw some Ute drawings of horses. These are considered modern since horses were introduced by the Spaniards in the 1600’s and a couple of even newer drawings and writings. Now, on to the sites.
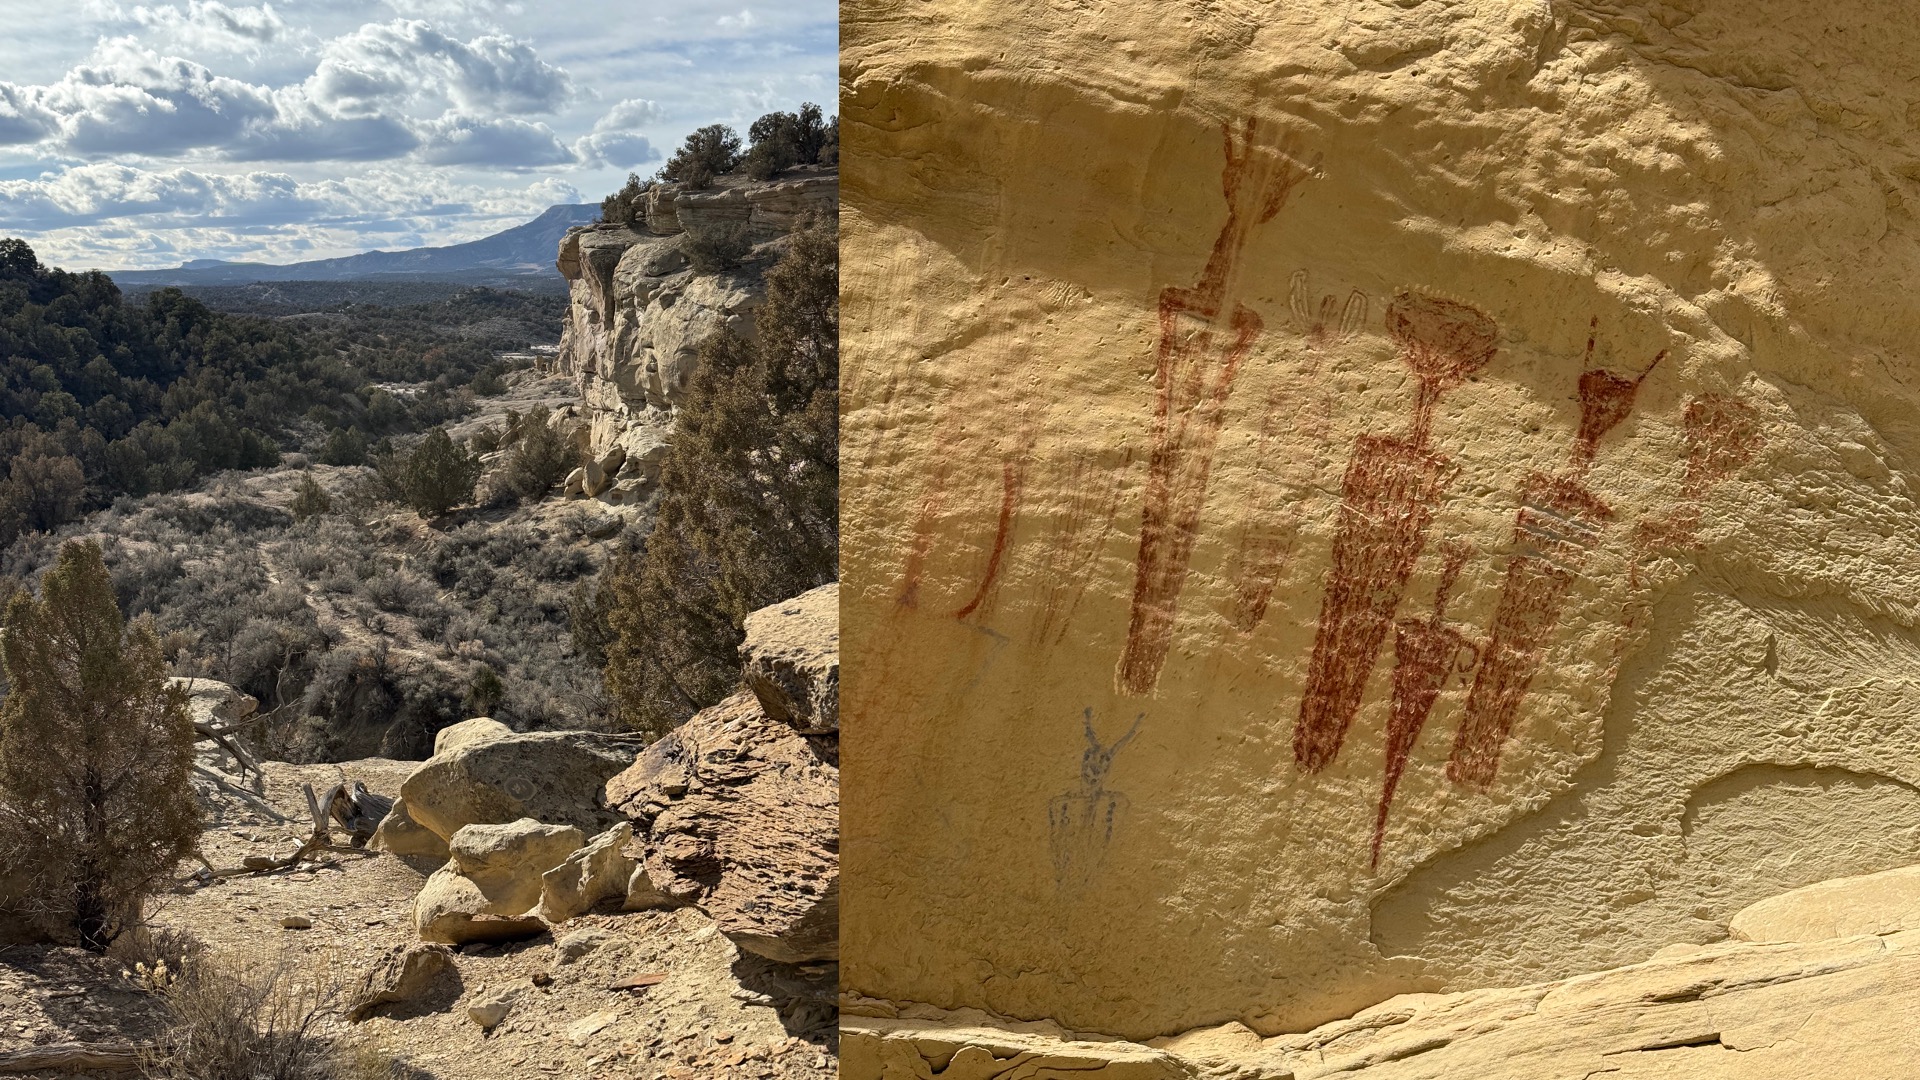
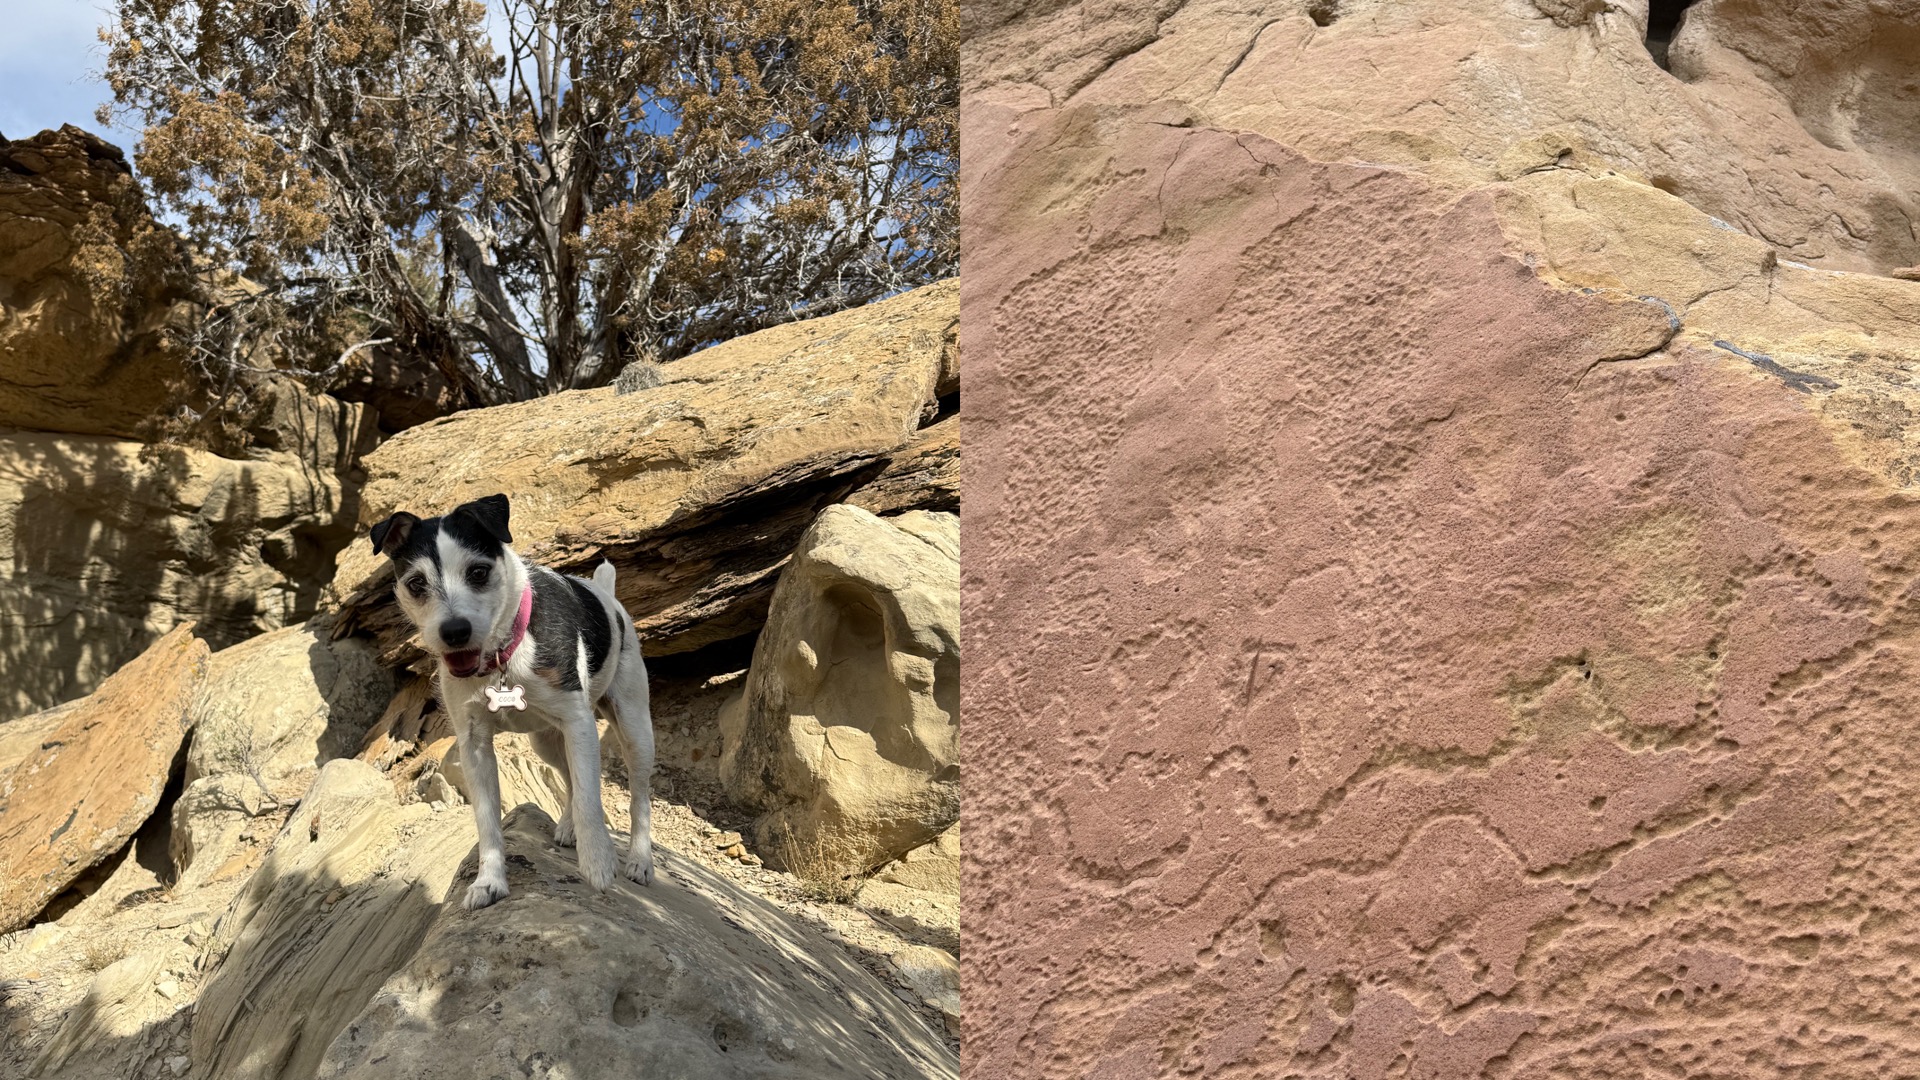
Site 10: Carrot Men
The Carrot Men site is not at milepost 5.6 as commonly listed. Instead, look for it around milepost 11.5 on Dragon Trail Road (also marked as Road 23). Mile markers are posted on the left side of the road and are counting down as we travel northward.
Just after milepost 12, you’ll see a yellow sign indicating a left turn. Follow this road for 0.3 miles to a parking area on the driver’s side. From there, follow the short hiking trail down the wash. Watch for the informational sign, then look toward the rock wall to spot the pictographs.
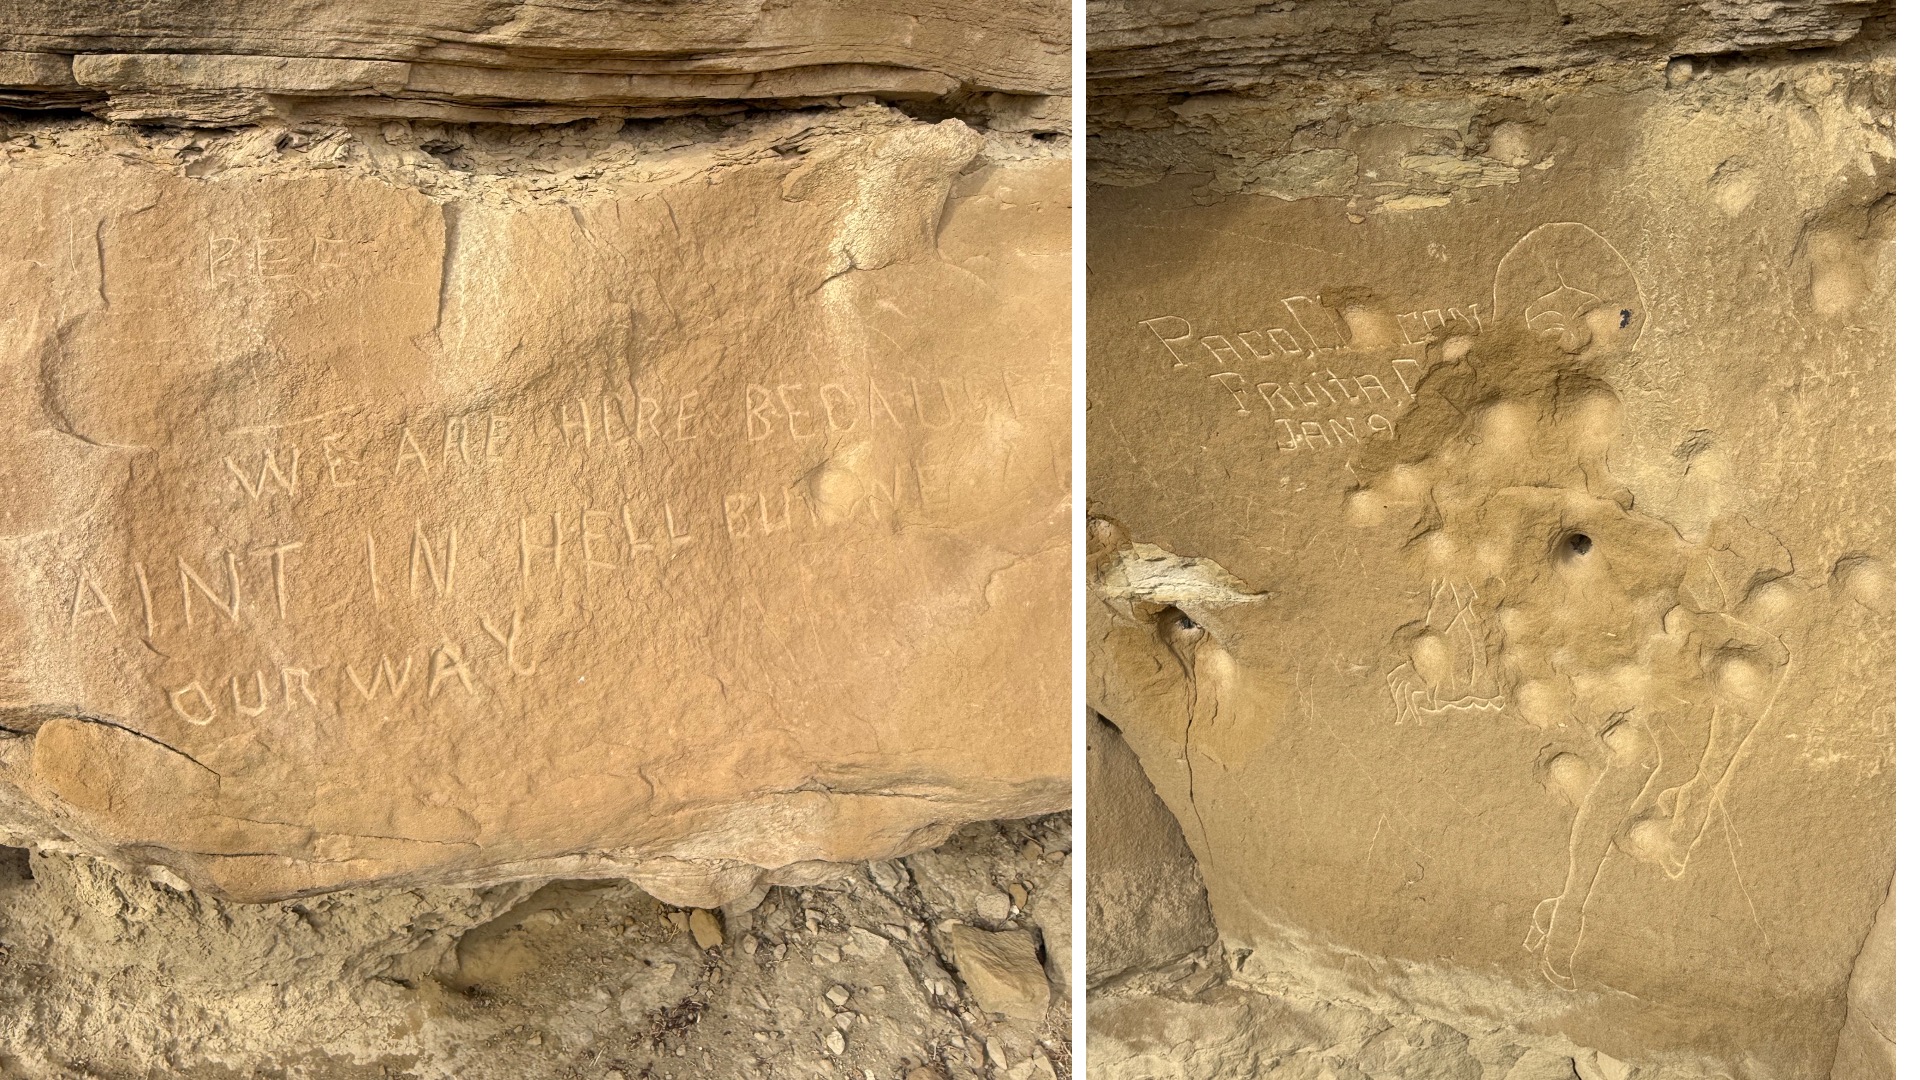
Site 11: Crook’s Brand
Return to Road 23 and head uphill. Just past milepost 10, turn left at the metal Crook’s Brand sign. Stay left until you reach a three-way intersection about a quarter mile in, then turn right. Follow the road through a wooden fence into a parking area.
This site features more modern rock art, including horses, warnings, and even pin-up-style figures—an interesting contrast to earlier pictographs.
Site 12: Fremont Ridge
Go back and continue up Road 23 to the top of the hill and turn right at the Fremont Ridge sign (Road 1045B). Follow this road for about 1.9 miles. At 1.3 miles, the road splits—take the left fork and watch for a “Dead End Road in 0.6 Miles” sign.
This section can be impassable when wet, so use caution. At the end, park and hike roughly a quarter mile along the rocks to the north to an informational sign. The petroglyphs here are paired with excellent views of the surrounding landscape.
Site 13: Fremont Shield
Back on the main road, continue to milepost 5.6. Look for the blue “100” road sign and turn right. Drive 0.3 miles, turn right again, and park. Walk through the fence, watching closely for signage—the user trail continues past the site, making it easy to miss. You’re only hiking a few minutes when you need to start looking. This red shield was part of a once larger panel but over time, the rock has broken away, leaving only a small part of what was there.
After exploring, we continued driving along Road 100 until it dropped back down to Highway 139, offering a descent with steep switchbacks just before the pavement.
Highway 139 Sites: A Scenic Finale
At Highway 139, you can turn left to visit Rangely for the usual services (fuel, food, hotel) or right to continue exploring rock art. We turned right and passed by several signed sites; we were simply running out of daylight and started cherry picking based on the descriptions we had. We’ll be sure to come back because we only explored a small amount of the area.
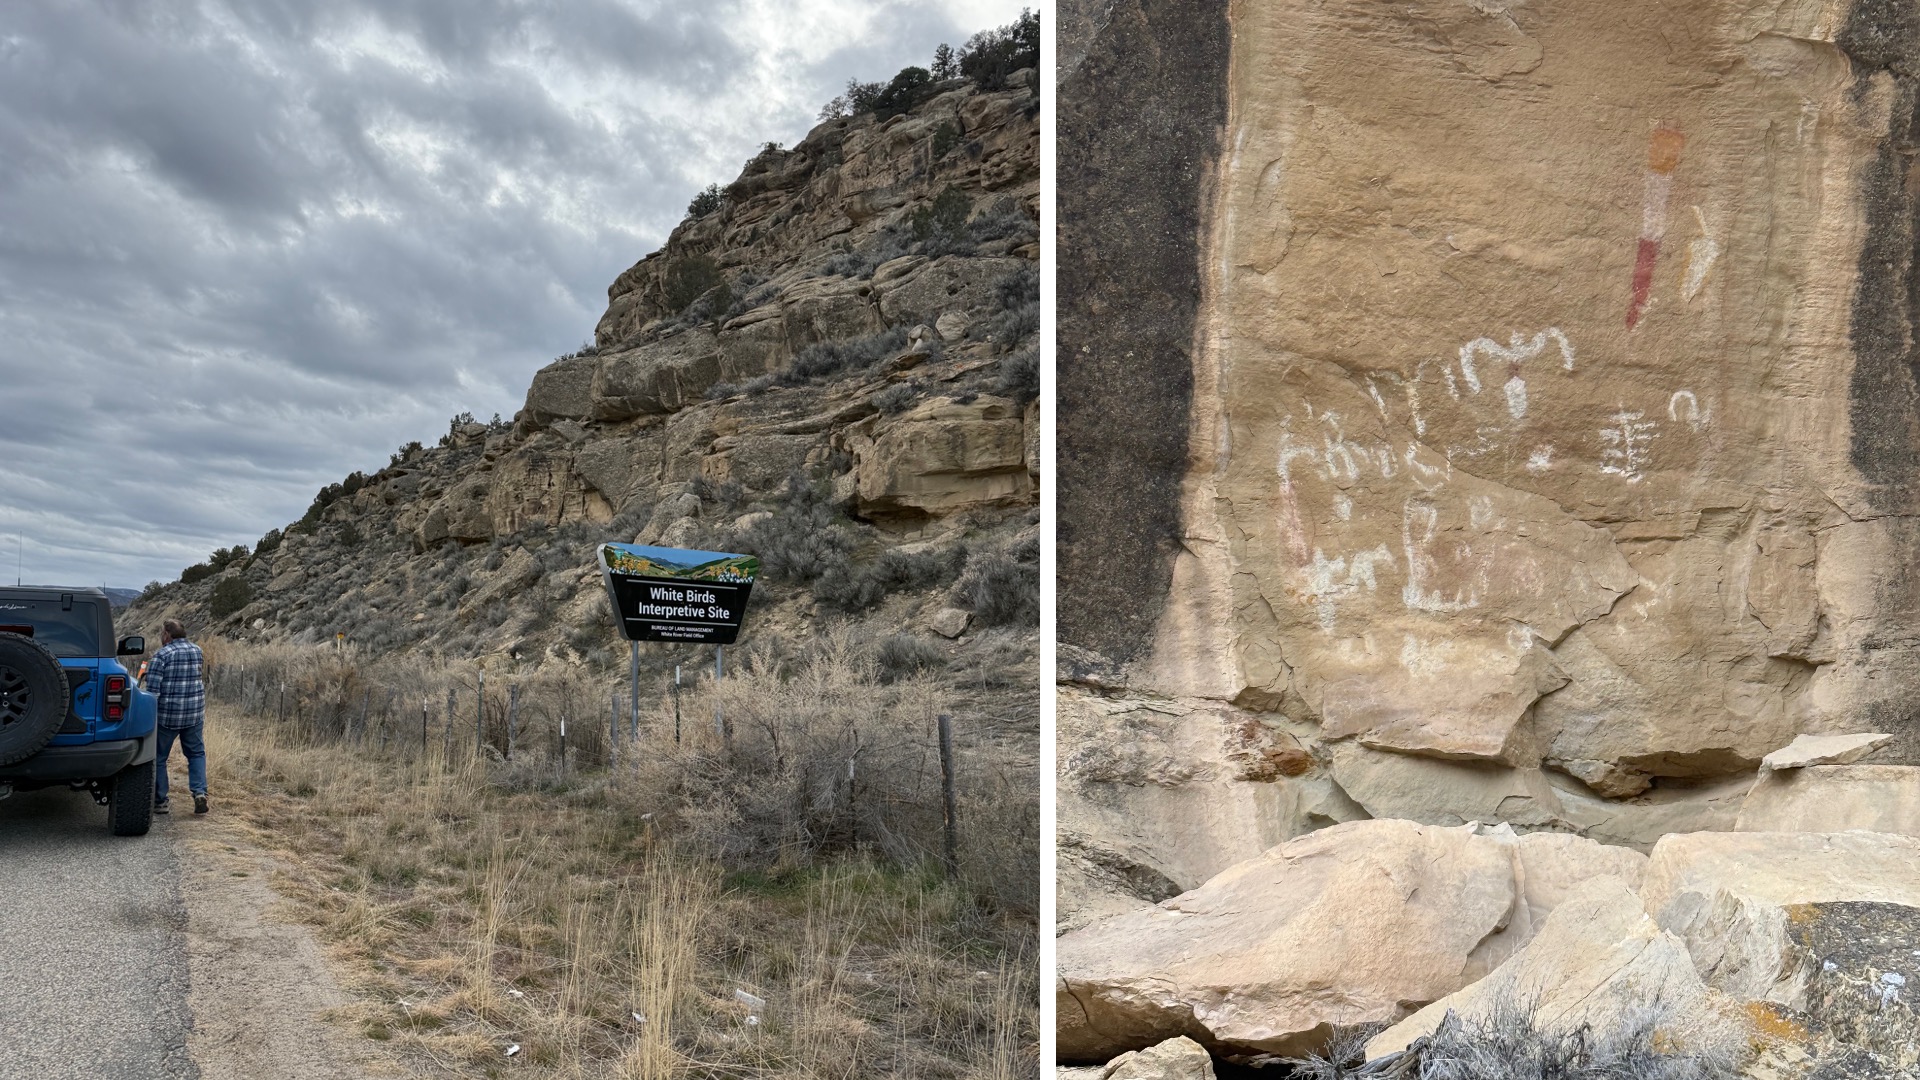
Site 6: White Bird
Located at milepost 56.5, pull off on the west side of the road and park. Walk along the fence to the right and pass through a green gate. The site involves a short, steep climb—look up to spot the decking—but it’s well worth the effort for the pictographs. We also found one image on the wall behind the metal sign at pavement level.
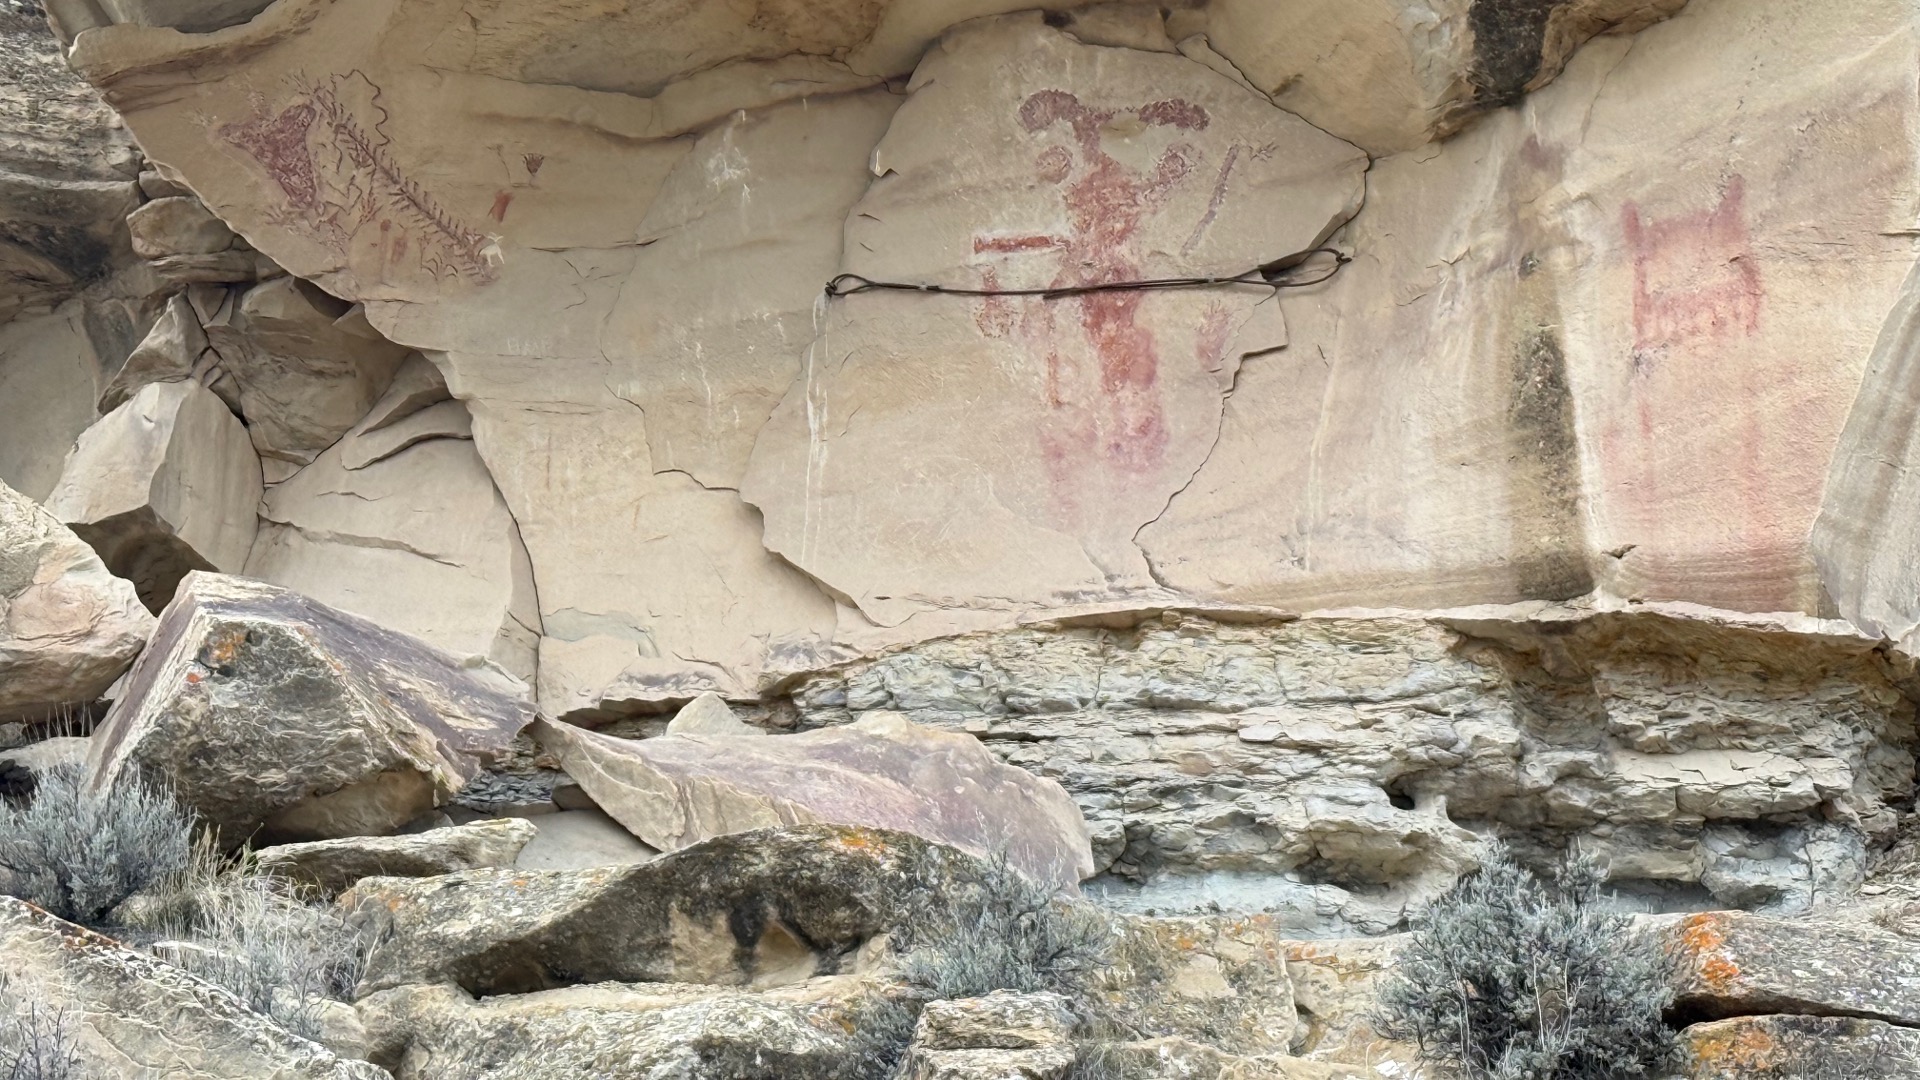
Site 7: Kokopelli
At milepost 56, the sign is on the right, but parking is on the left side of the highway. Use caution when crossing—this stretch sees fast-moving semi traffic. The pictographs here are striking, including panels with red maize imagery and the Kokopelli which looks to have been stabilized with a cable drilled into the rock on either side.
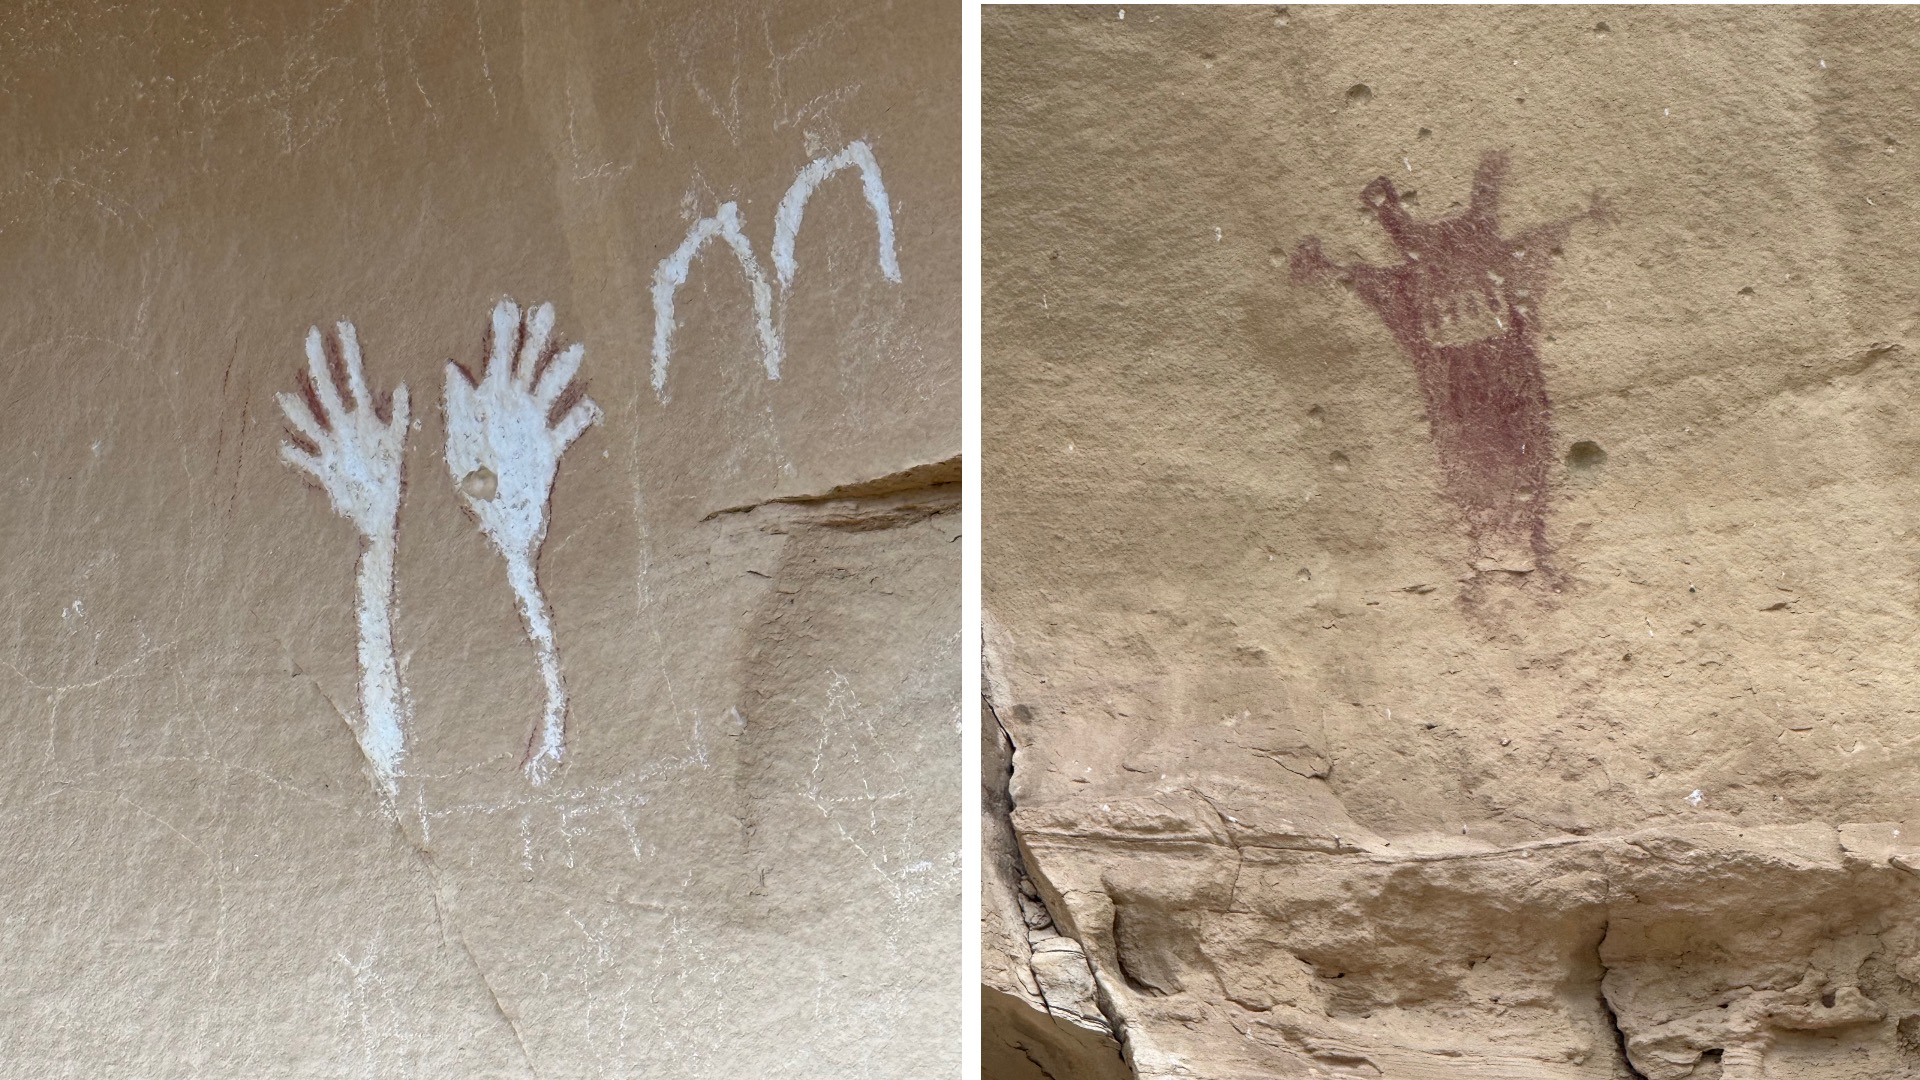
Site 8: Waving Hands
Our final stop was Waving Hands at milepost 53.5. Turn right into a well-marked parking area and enjoy two separate pictograph sites connected by flat, easy walking. The white hands are very distinctive, almost cartoonish.
A Perfect One-Day Bronco Adventure
From Loma to Loma, our full loop took about seven hours, including a relaxed packed lunch and plenty of time to explore each site. We rolled home to Fruita just as the sun dipped below the horizon.
For those seeking solitude, history, and scenery—without extreme technical driving—this is an ideal all-Bronco trail. It’s a reminder that some of the best adventures aren’t about conquering obstacles, but about slowing down, exploring the past, and enjoying the places your Bronco can take you.
If you’re already passing through western Colorado, Rangely’s rock art country is absolutely worth the stop.
Comments
You must log in or register to post here.