
Jul 20, 2020
For anyone who has ever tried to bleed a Ford Clutch... I have devised a one man hack to get all the air out of the system... without the need for a second person to pump the pedal. I will start off by stating that I have bleed the clutch master cylinder for the following ( 1993 Ford explorer ( 2 times), 2008 Ford Focus ( 1 time), 1996 Bronco ( 3 times) ). They all sucked. The explorer was my first attempt and it took a few days... and at least 300 pumps to get all the air out. Sometimes you can lucky.....but once the bubbles get into the master you are toast. This last time I had it 80% bled when the misses goofed ….and let up with the bleeder open. I was not a happy camper and from that point on I decided to do this without anyone helping.
You will need the following tools
1)https://www.harborfreight.com/mityvac-vacuum-pump-39522.html
Got to have this mityvac in order to pull the bubbles. The fittings and hose are needed also
2) C-clamp or vise to bench bleed the master. I used a clamp that I use for disk breaks.
3) go ahead and buy this bushing eliminator.... trust me.
4) grinder or Dremel to modify push rod
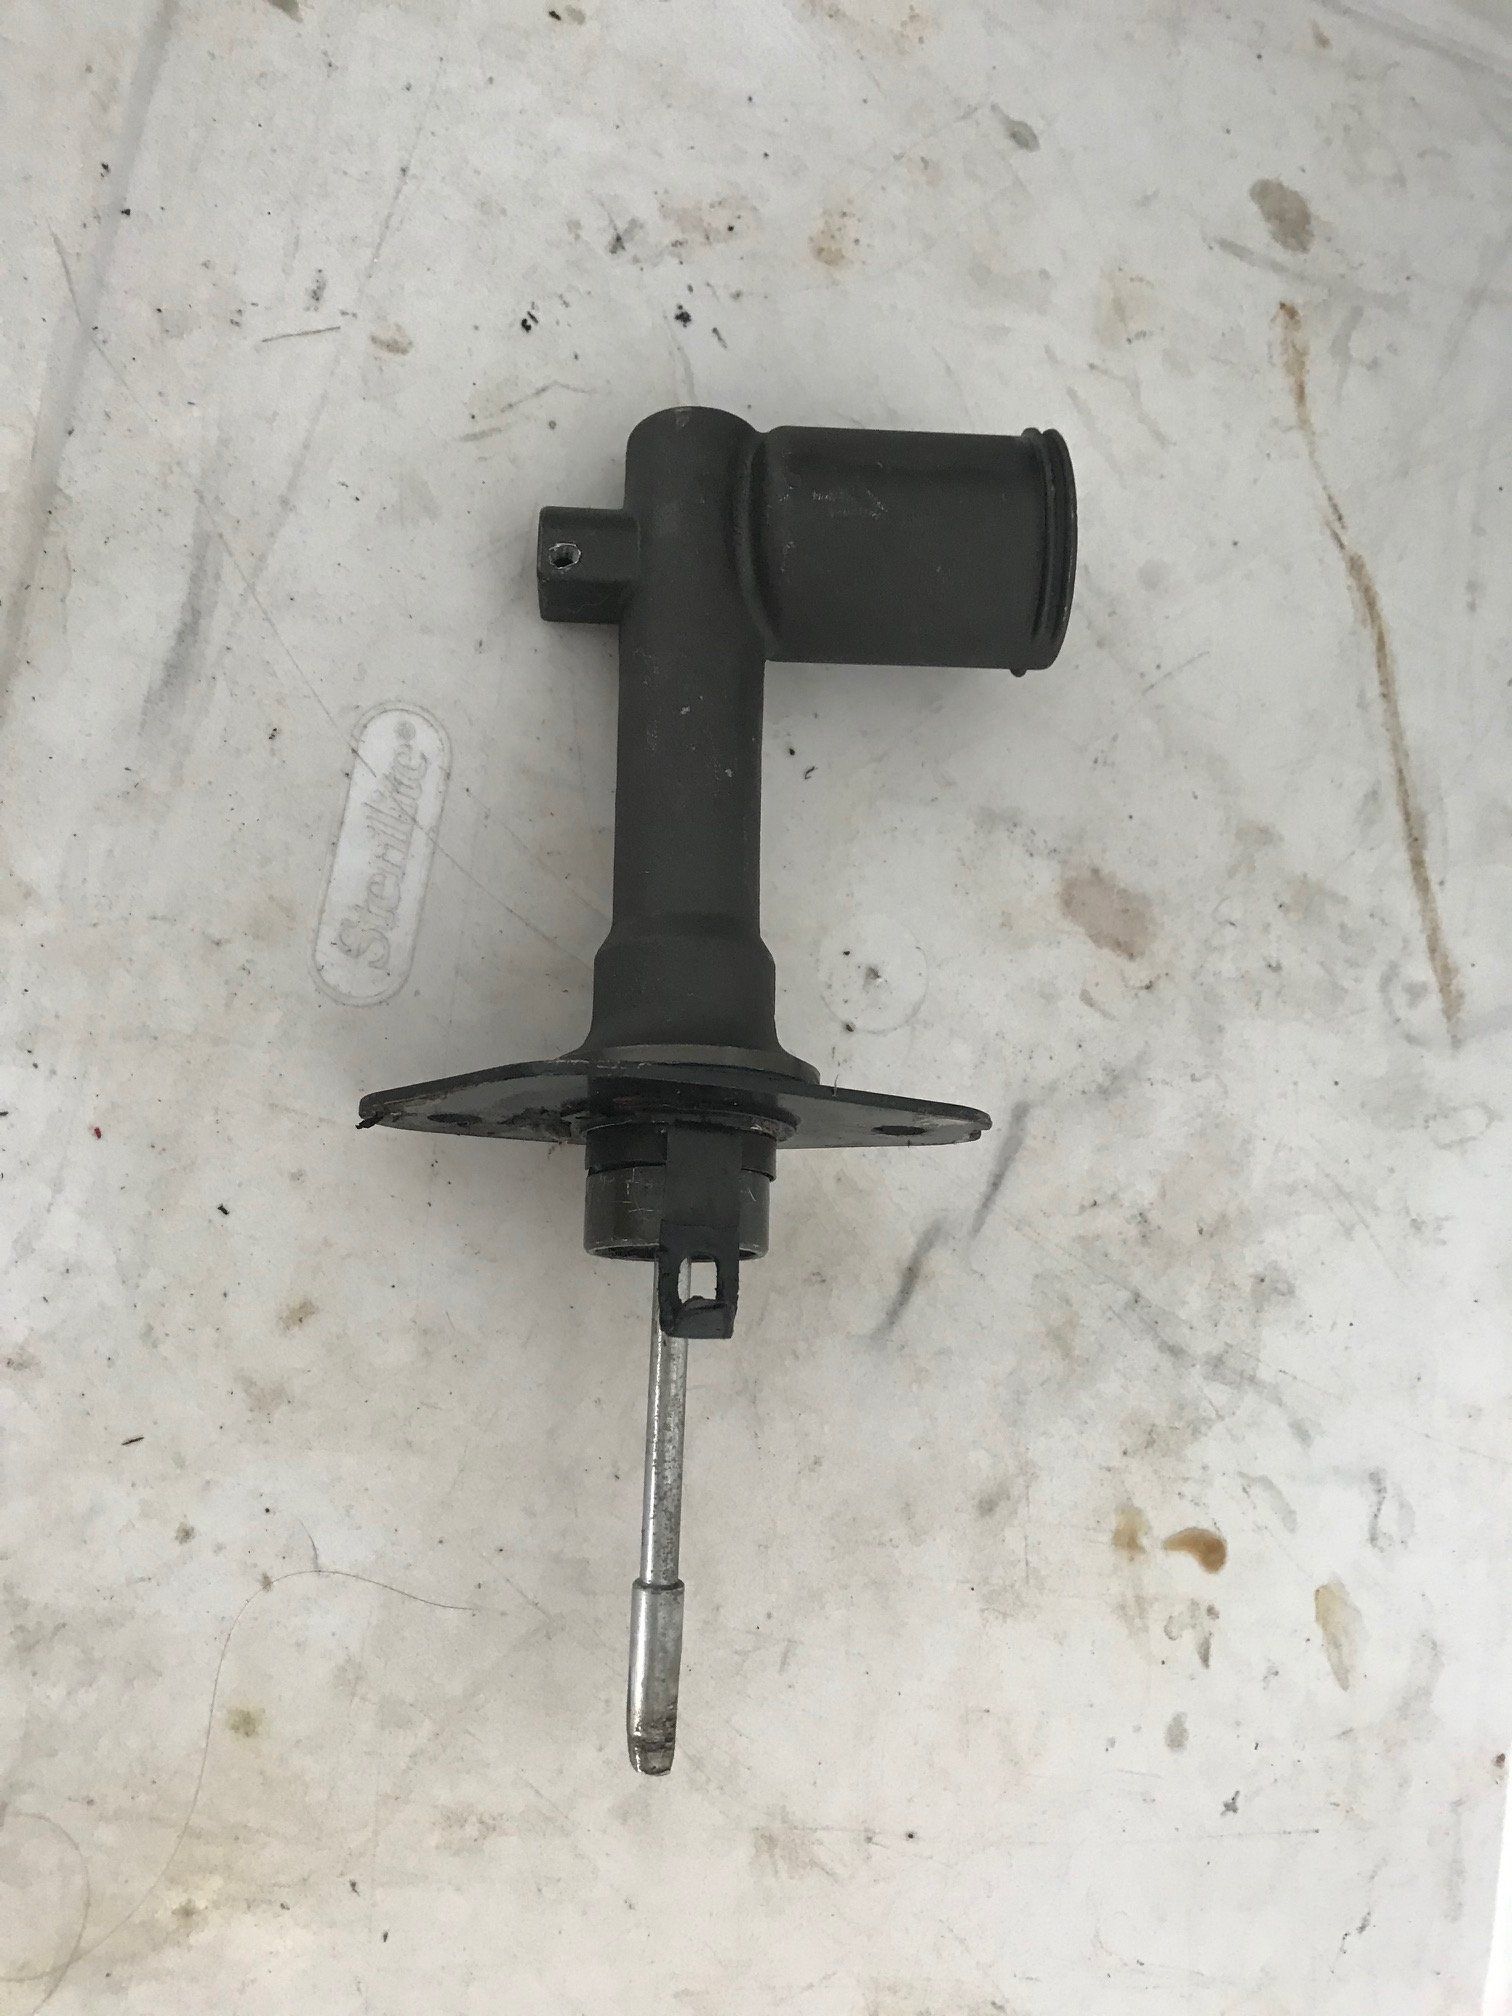
Pull the clutch master cylinder. It is only two bolts in the engine bay, 1 crush sleeve on the line connecting at the master, and the bushing removal to release the push rod from the pedal.
No core charge on the cylinder and I paid 50$ at autozone for a new one.
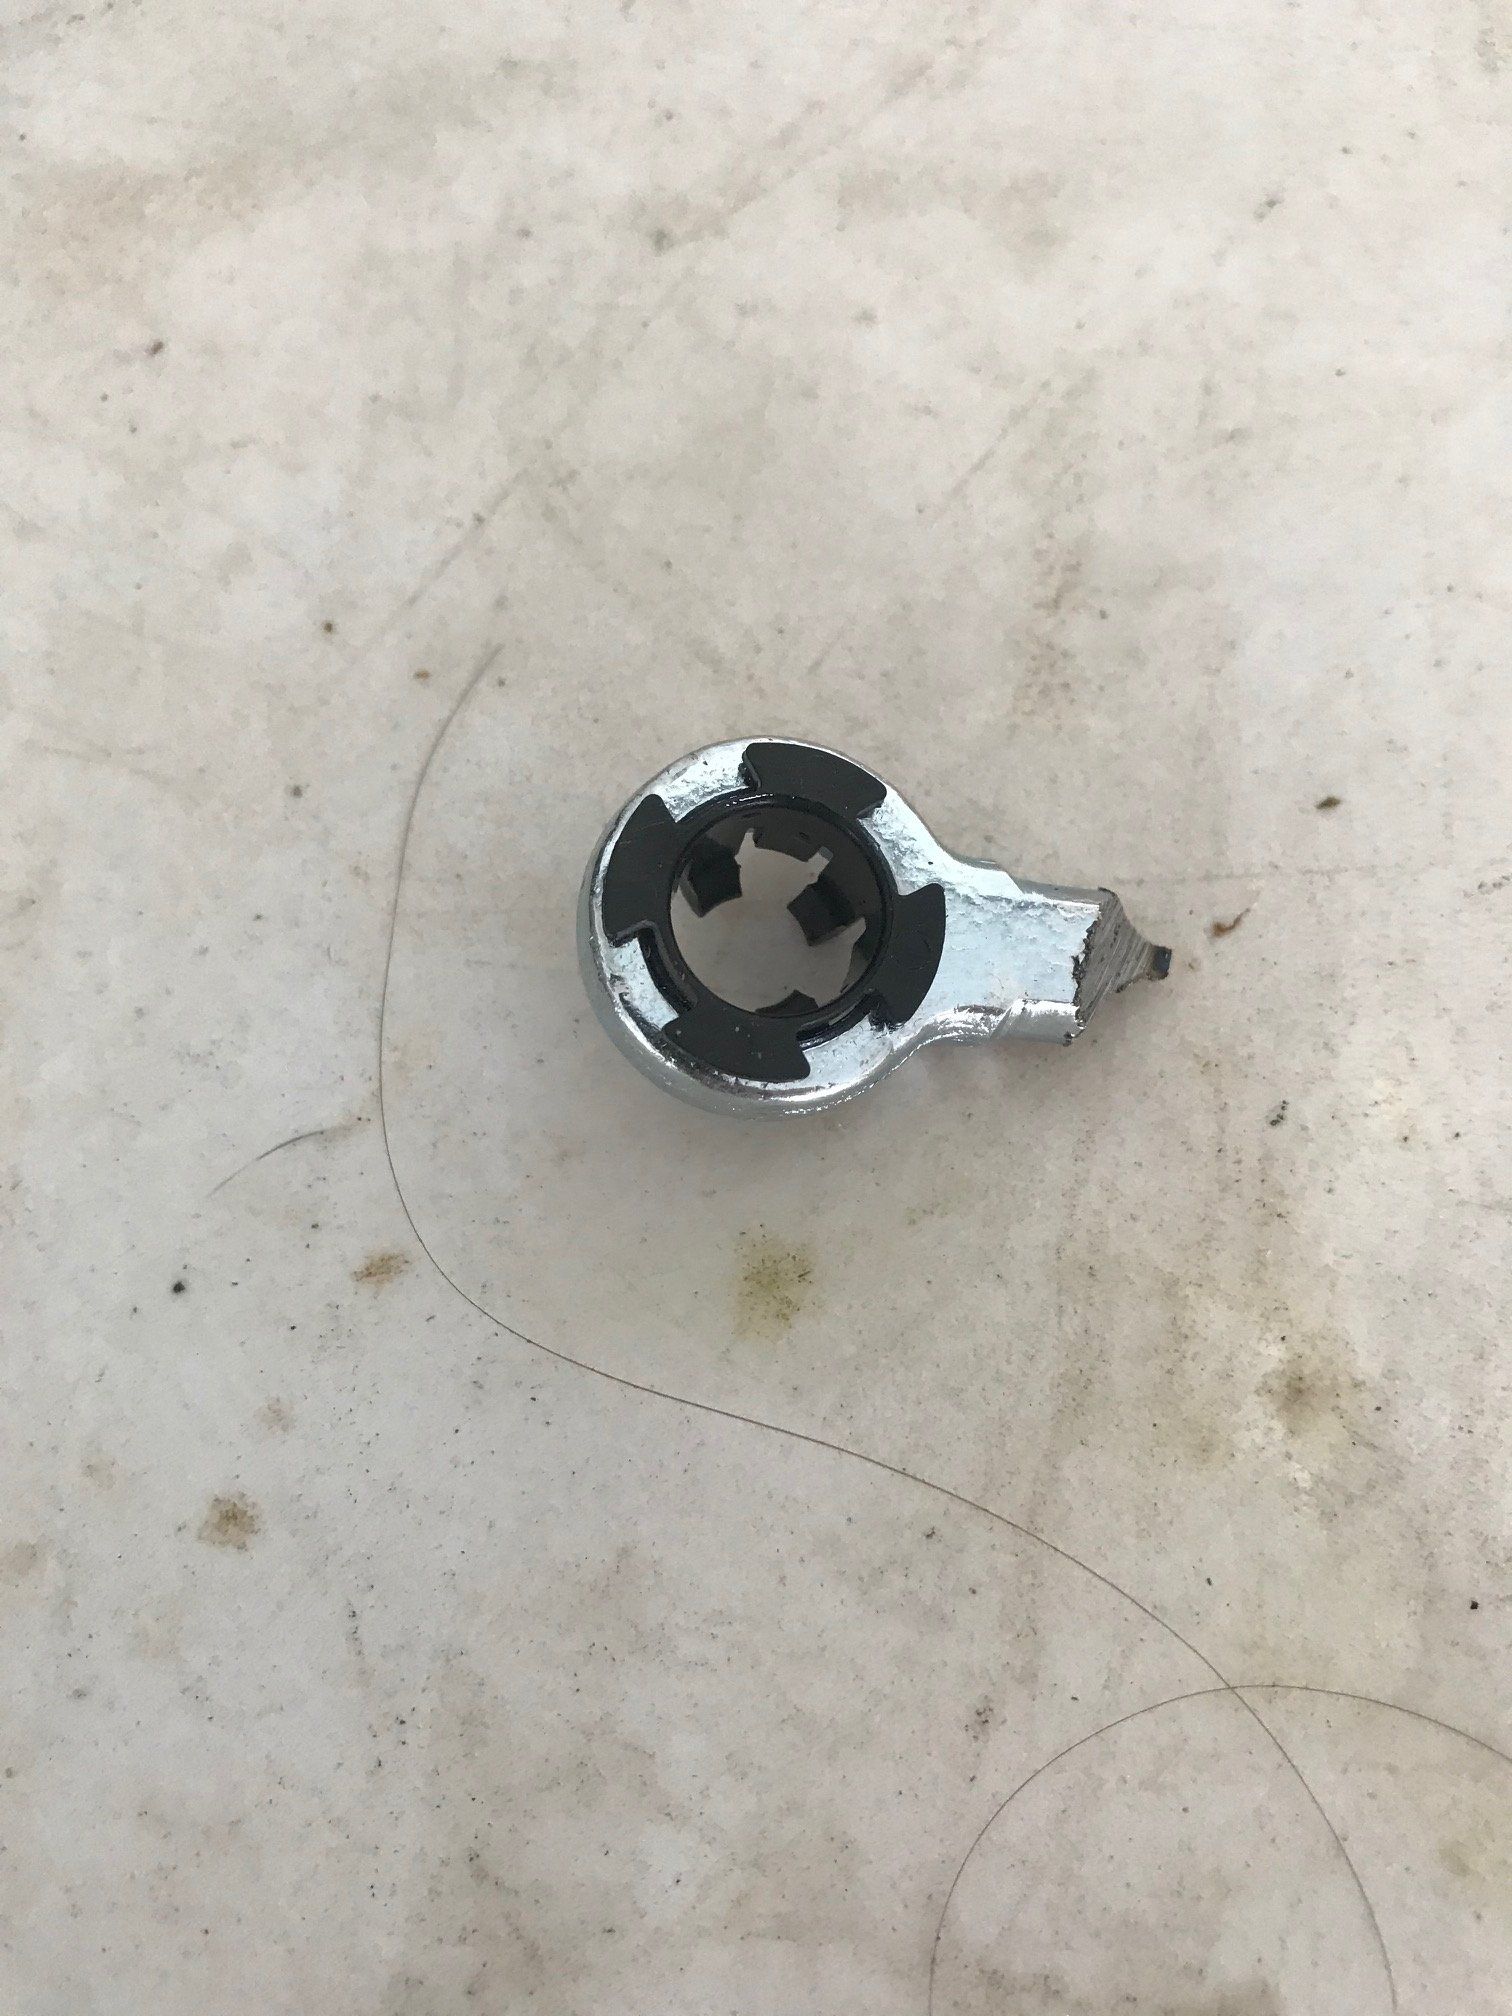
step 1) get out the grinder and destroy the brand new part. Only kidding but you will need a grinder or Dremel to cut the push rod.
The photo below shows the old master with the bushing cut off
Step 2) install the hemi joint adaptor from the kit over the rod and tighten down the set screws. You just eliminated the most useless thing Ford ever created..... Good job.
Step 3) now you have the line going from the master down to the slave cylinder. You shouldn't have any air in this line.... but let's bleed it anyway. I used a large piece of clear plastic tubing. I attached the tubing over the line and hose clamped it. This allowed me to fill the line with DOT fluid and create a little reservoir to pull fluid from the bleeder.

Step 4) Go underneath and locate the bleeder screw. It is located above the slave cylinder. Put your wrench on the screw.. then install the vacuum bleeder clear hose to the fitting. Pump up the vacuum and get around 20 on the meter. It should hold steady.. or drop 1 position every 2 or 3 seconds. This will let you know weather you have a good seal. If it drops then something is not connected properly. Open the bleeder and let fluid fill the hose until the gauge drops to 5... then close the bleeder and pump up to 20 again. Repeat the process until no bubbles are seen... and clear fluid is coming out of the bleeder.
I will continue below
You will need the following tools
1)https://www.harborfreight.com/mityvac-vacuum-pump-39522.html
Got to have this mityvac in order to pull the bubbles. The fittings and hose are needed also
2) C-clamp or vise to bench bleed the master. I used a clamp that I use for disk breaks.
3) go ahead and buy this bushing eliminator.... trust me.
4) grinder or Dremel to modify push rod
Pull the clutch master cylinder. It is only two bolts in the engine bay, 1 crush sleeve on the line connecting at the master, and the bushing removal to release the push rod from the pedal.
No core charge on the cylinder and I paid 50$ at autozone for a new one.
step 1) get out the grinder and destroy the brand new part. Only kidding but you will need a grinder or Dremel to cut the push rod.
The photo below shows the old master with the bushing cut off
Step 2) install the hemi joint adaptor from the kit over the rod and tighten down the set screws. You just eliminated the most useless thing Ford ever created..... Good job.
Step 3) now you have the line going from the master down to the slave cylinder. You shouldn't have any air in this line.... but let's bleed it anyway. I used a large piece of clear plastic tubing. I attached the tubing over the line and hose clamped it. This allowed me to fill the line with DOT fluid and create a little reservoir to pull fluid from the bleeder.
Step 4) Go underneath and locate the bleeder screw. It is located above the slave cylinder. Put your wrench on the screw.. then install the vacuum bleeder clear hose to the fitting. Pump up the vacuum and get around 20 on the meter. It should hold steady.. or drop 1 position every 2 or 3 seconds. This will let you know weather you have a good seal. If it drops then something is not connected properly. Open the bleeder and let fluid fill the hose until the gauge drops to 5... then close the bleeder and pump up to 20 again. Repeat the process until no bubbles are seen... and clear fluid is coming out of the bleeder.
I will continue below
Last edited by a moderator:
Jul 20, 2020