
Aug 25, 2022
In this post I go over how I installed a GMRS Radio in my 2022 2 door Bronco.
Things that were important to me; I prefer the antenna mounted in the rear, so it can be tall, and relatively protected from trees and branches and stuff. I chose a mobile radio that has has controls on the mic, so I can stuff the transceiver somewhere out of the way. I didnt want to drill holes in any "large" plastic parts. I wanted to make use of as much pre-existing wire chases as possible.
Parts needed:
1) Midland MXT275 Radio
2) Thru Hulls for RJ-45
3) A 1" grommet
4) Trunk Lip NMO antenna mount
5) Antenna (No ground plane required) https://theantennafarm.com/shop-by-...igh-gain-antennas/833-larsen-nmo450chw-detail
6) ~20' Length of 8-conductor Cat5e network wire (had this lying around). You can use Cat6, but there's really no point.
7) RJ-45 Crimp Ends for Cat5e (had this lying around)
8) RJ-45 strain relief boots (had this lying around)
9) RG58U Compatible crimp end for coaxial cable (I picked some of these up at a Pilot truck stop)
10) Some small screws
11) Electrical Tape
12) Small zip ties
Tools needed:
1) Panel poppers / trim piece pry bars / spudgers
2) 1" hole saw (step drill would be ideal, don't use a spade bit)
3) Channel Lock pliers
4) Soldering Iron + Solder
5) RG58 Coax crimping tool
6) Drill and bits
7) 7mm socket / Bronco toolkit
8) Bit of heat shrink tube
9) Heat gun (or lighter) to set shrink tube
10) Cat5 crimper
11) Cat5 tester
12) Optional, but recommended, SWR meter for Antenna tuning
13) Optional, cut off wheel to trim antenna for tuning
This took me two solid evenings, after work to finish up. I'm really happy with the results, it looks clean and professional.
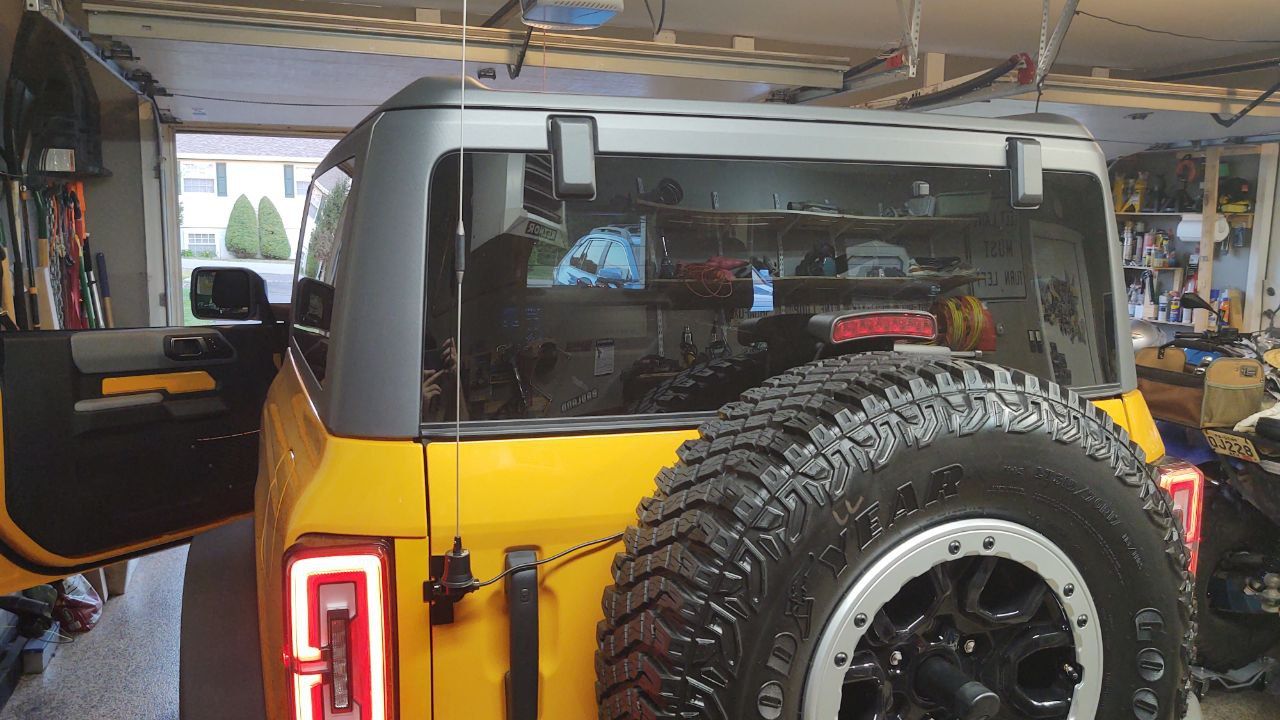
So the main idea is to mount the antenna on the swing gate so that when the gate is open, the antenna is out of the way of the glass, and wont interfere with taking the top off.
The radio itself will get mounted in the cubby hole in the back passenger side, and get powered by the 12V power socket. We'll run CAT5 cable from back there up to the center console, where the radio mic can be plugged in (and unplugged when not needed or wanted).
1) Take the spare tire off.
2) On the inside of the swing gate, there's a black wire hider. Using a trim remover, pry along the bottom edge to release the tabs, and set aside.
3) On the inside of the swing gate, there's another black trim piece. Remove that too.
4) To the left of the tire mount on the outside, you'll see a rubber wire hider thing. Unbug that and remove the electrical tape, inside and out.
5) The NMO mount comes with a substantial length of cable. Cut off the radio-connector end and discard. We can't really have the end on there while we do this because we have to fish the cable through a bunch of tight stuff. We'll trim the wire to length later and add a new end once everything is routed.
6) Mount the NMO mount on your swing gate somewhere. Gently test closure of the swing gate, you'll probably have to bend the tab that sticks out over the lip a little. I used a vice, but pliers would work too. **Note, the door alignment might be off because the spare tire isnt on the gate**.
7) Now, push the coaxial cable through the rubber grommet thing on the tail gate and start fishing the wire.
8) Once you have the length of wire pulled all the way through, re-tape the rubber grommet thing inside and out, and redo the zip tie for the camera/3rd brake light.
9) Route the coax through the door and over to the fabric wire protector thing, zip tying as you go. The more you zip tie, the less likely you'll develop a rattle someday. You'll have to untape the ends on both sides to fish the wire through the protector.
10) Now would be a good time to remove the passenger side rear trim panel. I found instructions for that on B6G pretty easily for the 2Door. The short of it is, you have to remove the cargo tie downs, the rear door closure kick plate thing, and then pop a ton of push tabs to remove the panel. Take your time. Undo the wires for the stock stuff, and remove it from the Bronco so you can easily work on it.
I didn't take pictures of this part because I was too focused on the job, but once you have it out, its super easy to see what you need to do.
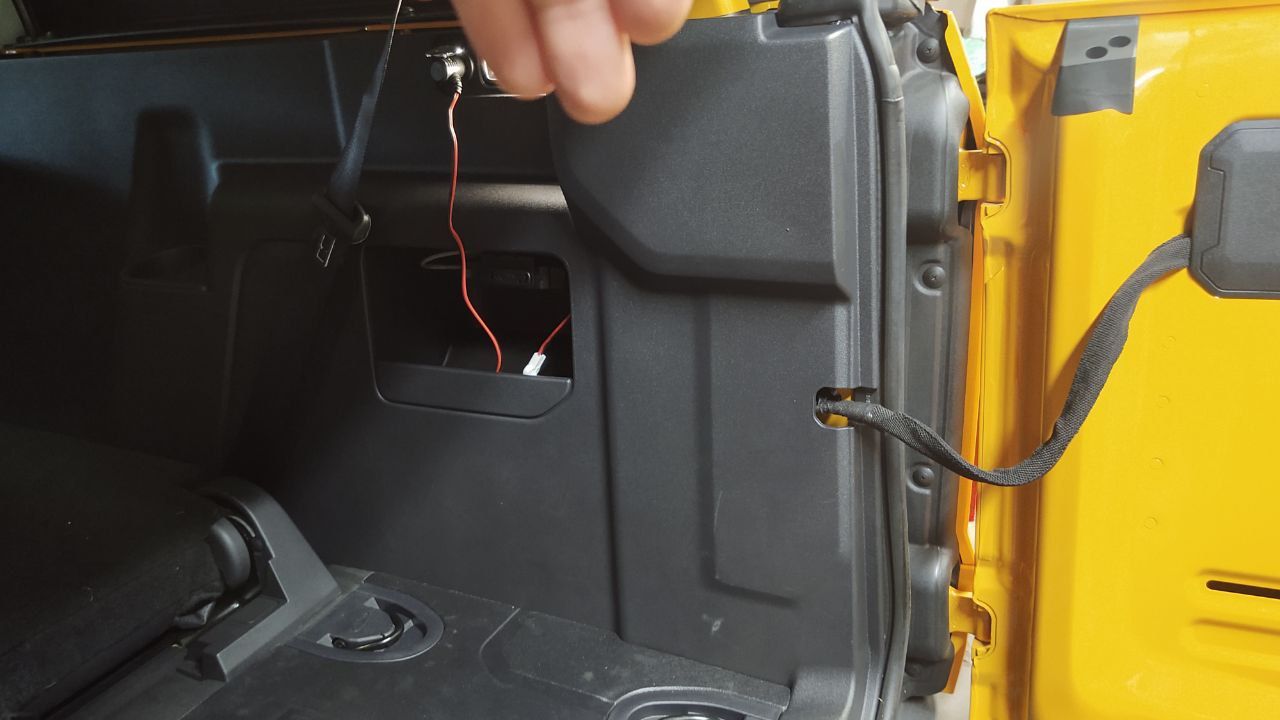
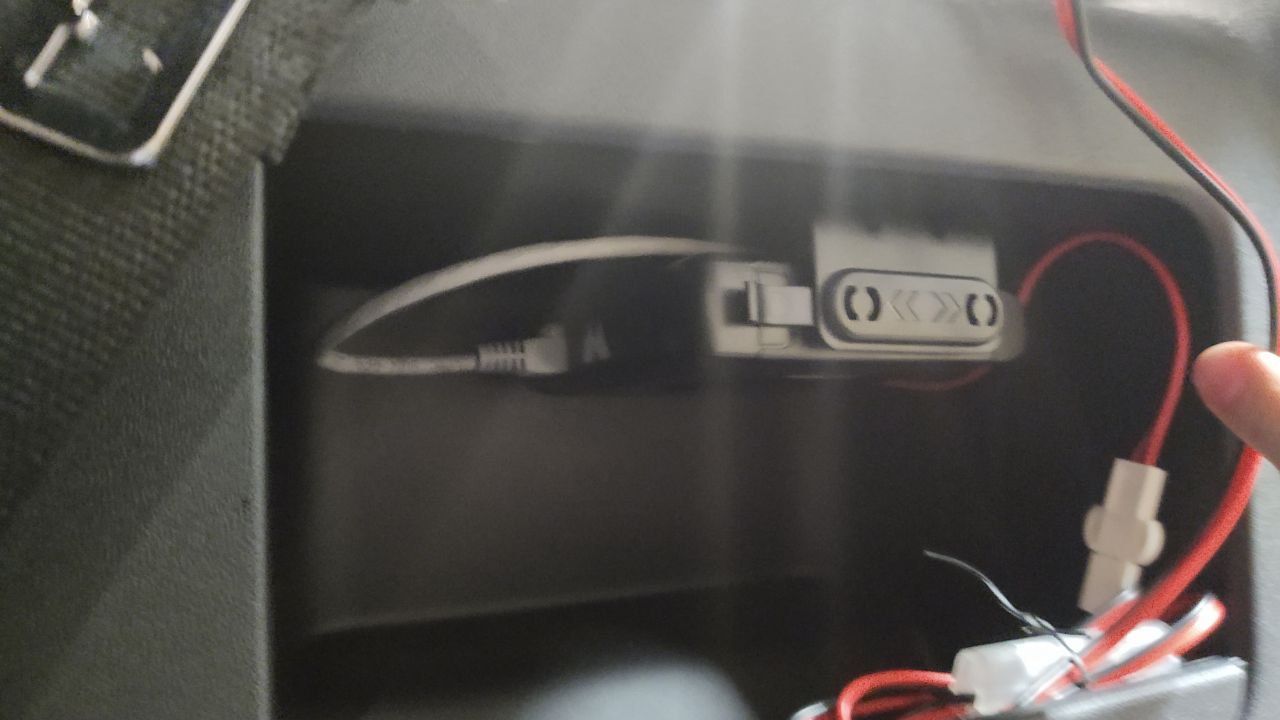
11) You'll need to make some holes with your hole saw in the cubby box. One will be for the coaxial cable, the other will be for the RJ45 thru hull (thats what the gray wire is connected to in this pic).
Tip: Put them lower than where I put them. My mounting location is too high and makes it more challenging to route the cables properly.
12) Install the rubber grommet on the one hole for the coax connector, and the RJ45 thru hull on the other.
13) Mount the radio mount to the top of the box or something. You could probably mount it sideways too. Or dont even mount it. Idk, whatever you want.
14) Pull the coaxial through the wire protector, and then re-tape the ends so they're nice and clean.
15) Route the RJ45 cable next. This isn't too bad actually.
15a) Starting with the passenger door kickplate removed fish the length of cat5 back using the wire hiding channels (I just tucked it right next to the existing wire harness using the factory zip ties.)
15b) Follow the main black wire spine that goes to the rear lights and stuff over the wheel hump. Keep your cat5 on top, and zip tie it frequently.
15c) Cut to or pull an appropriate length, install a strain boot, and crimp an end on the cat5.
15d) Now, do the forward direction. Route the remaining cat5 along the floor, and then up around where the speaker is. You'll probably have to remove that plastic panel.
15e) Pull out the glove box and keep routing the cat5 behind there.
15f) Follow instructions here to pop off the center console. Just fast forward the video. There are only 2x 7mm bolts you need to undo. Don't go crazy dismantling the top of the dash.
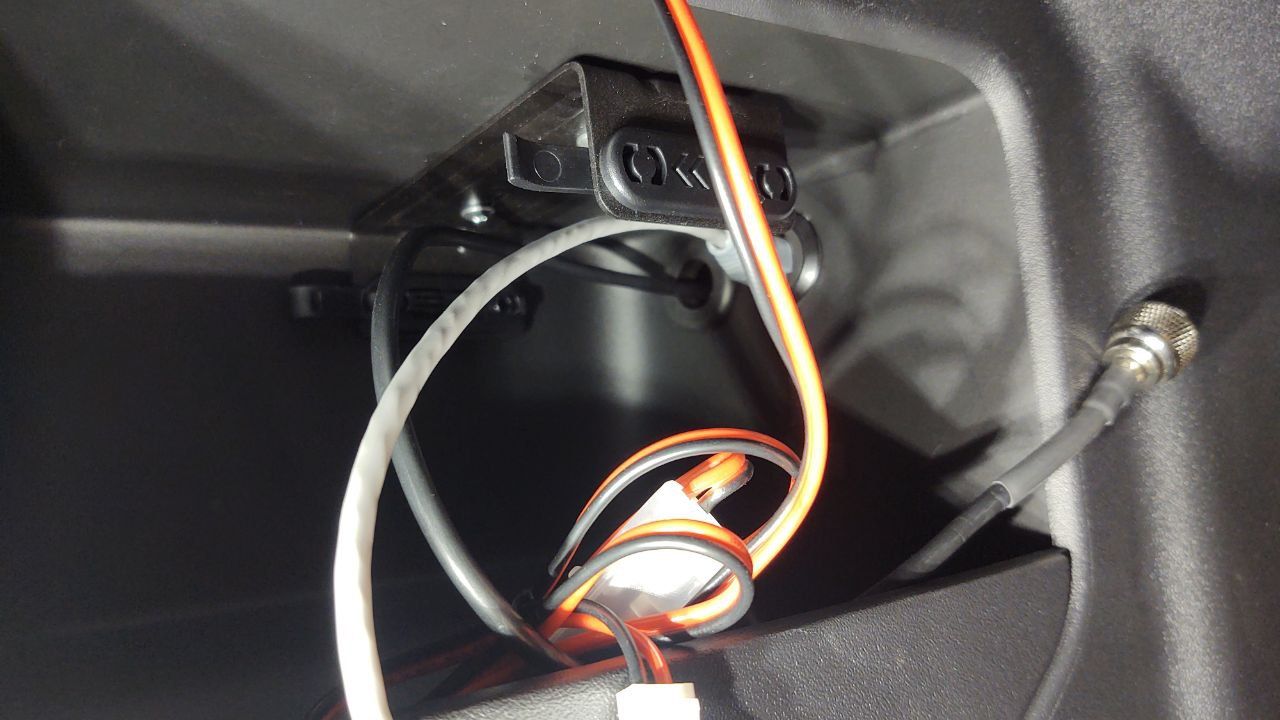
15g) On the bottom of that control panel, there is another smaller panel you can feel more comfortable cutting a hole in. It's also pretty easy to remove, once you're there. You can put your connector wherever you want, I just thought this cheap part would be a good option, and it had enough room behind it.
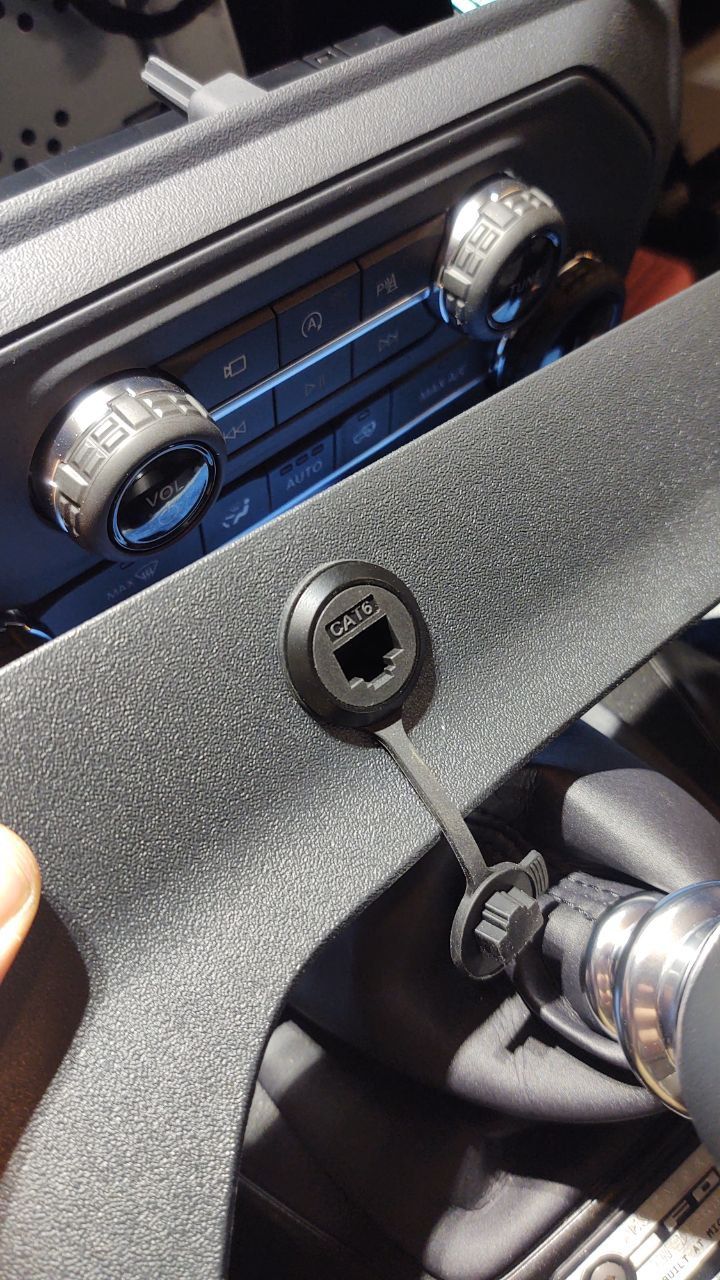
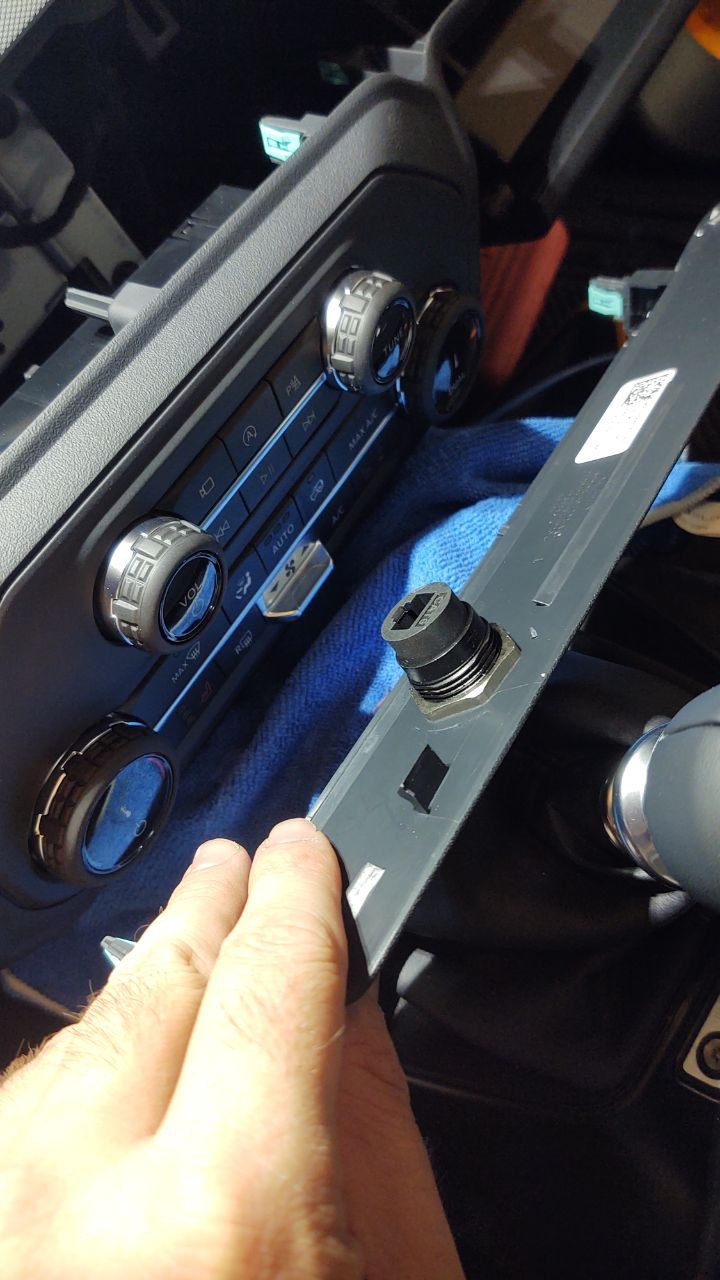
15h) Install the thru-hull here. 20-20 Hindsight. Mount it 180 degrees rotated relative to how I have it pictured. That will make it easier to unplug the cable when you want to.
15i) Put another RJ-45 end on the cable and plug it into the thru hull and reinstall the trim panels.
16) Reinstall the passenger side rear trim panel, and other trim pieces we removed, and fish/connect all the wires and stuff. I think there were 3 factory plugs to re-connect, plus our coaxial wire (through the grommet) and our RJ-45 end.
17) Trim the coaxial cable to length. Note: you want enough free cable to make removing the panel in the future easy, but not so much that you have a coil of it. Coils will actually mess up your radio's transmission. Put on a new PL-259 connector. Solder the tip, and crimp the other end. This might take some practice or other youtubing to learn how to do. Test for shorts with a multimeter. If the tip is shorted to the barrel, you screwed it up and need to start over. If not, you're probably fine. You might want to make sure you got a good contact on the NMO connector side on the outside of the vehicle too, just to be sure. Shrink tube over the crimp really makes it look nice. I hope you slid the shrink tube on the wire before you crimped it!
18) Connect all the wires and mount the radio. Use the 12V socket for easy power. This appears to always have juice. Alternatively, you can use the AUX switches and wire something up, but in ford's infinite wisdom, you cant power something in the rear of the vehicle and also have something powered on the roof. DERP.
18a) Make a ~12" cat5 patch cable, to connect the radio to the thru hull.
19) Go back to the driver seat, and plug in the microphone to the underside of the control panel in the center console, where we installed the thru-hull.
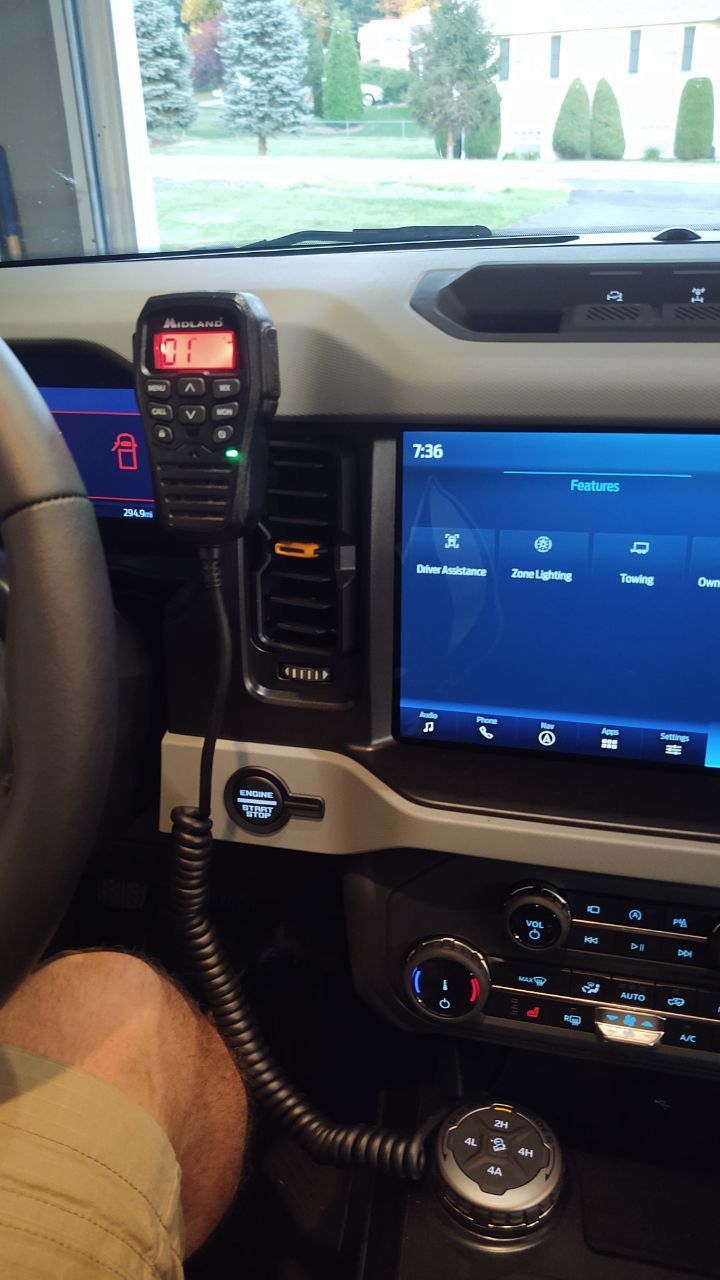
20) Mount the mic/speaker shoe on the dash somewhere (or don't, Idk, that's up to you). I drilled 2 small holes in it and fed the screws through, since I don't trust that adhesive tape. I figured the gray trim piece on the dash was pretty safe, and if the next guy really wants to fix those holes, its a smallish part of the dash to replace.
22) Read the manual if you want to change where the radio speaker plays through (you can set it to the head unit or the mic/handle or both). You can also change the background color of the mic unit.
23) Breaker Breaker 0-5, this here Four Wheel Kyle, be prepared, drive safely, and wheel with buddies! Signing off!
Things that were important to me; I prefer the antenna mounted in the rear, so it can be tall, and relatively protected from trees and branches and stuff. I chose a mobile radio that has has controls on the mic, so I can stuff the transceiver somewhere out of the way. I didnt want to drill holes in any "large" plastic parts. I wanted to make use of as much pre-existing wire chases as possible.
Parts needed:
1) Midland MXT275 Radio
2) Thru Hulls for RJ-45
3) A 1" grommet
4) Trunk Lip NMO antenna mount
5) Antenna (No ground plane required) https://theantennafarm.com/shop-by-...igh-gain-antennas/833-larsen-nmo450chw-detail
6) ~20' Length of 8-conductor Cat5e network wire (had this lying around). You can use Cat6, but there's really no point.
7) RJ-45 Crimp Ends for Cat5e (had this lying around)
8) RJ-45 strain relief boots (had this lying around)
9) RG58U Compatible crimp end for coaxial cable (I picked some of these up at a Pilot truck stop)
10) Some small screws
11) Electrical Tape
12) Small zip ties
Tools needed:
1) Panel poppers / trim piece pry bars / spudgers
2) 1" hole saw (step drill would be ideal, don't use a spade bit)
3) Channel Lock pliers
4) Soldering Iron + Solder
5) RG58 Coax crimping tool
6) Drill and bits
7) 7mm socket / Bronco toolkit
8) Bit of heat shrink tube
9) Heat gun (or lighter) to set shrink tube
10) Cat5 crimper
11) Cat5 tester
12) Optional, but recommended, SWR meter for Antenna tuning
13) Optional, cut off wheel to trim antenna for tuning
This took me two solid evenings, after work to finish up. I'm really happy with the results, it looks clean and professional.
So the main idea is to mount the antenna on the swing gate so that when the gate is open, the antenna is out of the way of the glass, and wont interfere with taking the top off.
The radio itself will get mounted in the cubby hole in the back passenger side, and get powered by the 12V power socket. We'll run CAT5 cable from back there up to the center console, where the radio mic can be plugged in (and unplugged when not needed or wanted).
1) Take the spare tire off.
2) On the inside of the swing gate, there's a black wire hider. Using a trim remover, pry along the bottom edge to release the tabs, and set aside.
3) On the inside of the swing gate, there's another black trim piece. Remove that too.
4) To the left of the tire mount on the outside, you'll see a rubber wire hider thing. Unbug that and remove the electrical tape, inside and out.
5) The NMO mount comes with a substantial length of cable. Cut off the radio-connector end and discard. We can't really have the end on there while we do this because we have to fish the cable through a bunch of tight stuff. We'll trim the wire to length later and add a new end once everything is routed.
6) Mount the NMO mount on your swing gate somewhere. Gently test closure of the swing gate, you'll probably have to bend the tab that sticks out over the lip a little. I used a vice, but pliers would work too. **Note, the door alignment might be off because the spare tire isnt on the gate**.
7) Now, push the coaxial cable through the rubber grommet thing on the tail gate and start fishing the wire.
8) Once you have the length of wire pulled all the way through, re-tape the rubber grommet thing inside and out, and redo the zip tie for the camera/3rd brake light.
9) Route the coax through the door and over to the fabric wire protector thing, zip tying as you go. The more you zip tie, the less likely you'll develop a rattle someday. You'll have to untape the ends on both sides to fish the wire through the protector.
10) Now would be a good time to remove the passenger side rear trim panel. I found instructions for that on B6G pretty easily for the 2Door. The short of it is, you have to remove the cargo tie downs, the rear door closure kick plate thing, and then pop a ton of push tabs to remove the panel. Take your time. Undo the wires for the stock stuff, and remove it from the Bronco so you can easily work on it.
I didn't take pictures of this part because I was too focused on the job, but once you have it out, its super easy to see what you need to do.
11) You'll need to make some holes with your hole saw in the cubby box. One will be for the coaxial cable, the other will be for the RJ45 thru hull (thats what the gray wire is connected to in this pic).
Tip: Put them lower than where I put them. My mounting location is too high and makes it more challenging to route the cables properly.
12) Install the rubber grommet on the one hole for the coax connector, and the RJ45 thru hull on the other.
13) Mount the radio mount to the top of the box or something. You could probably mount it sideways too. Or dont even mount it. Idk, whatever you want.
14) Pull the coaxial through the wire protector, and then re-tape the ends so they're nice and clean.
15) Route the RJ45 cable next. This isn't too bad actually.
15a) Starting with the passenger door kickplate removed fish the length of cat5 back using the wire hiding channels (I just tucked it right next to the existing wire harness using the factory zip ties.)
15b) Follow the main black wire spine that goes to the rear lights and stuff over the wheel hump. Keep your cat5 on top, and zip tie it frequently.
15c) Cut to or pull an appropriate length, install a strain boot, and crimp an end on the cat5.
15d) Now, do the forward direction. Route the remaining cat5 along the floor, and then up around where the speaker is. You'll probably have to remove that plastic panel.
15e) Pull out the glove box and keep routing the cat5 behind there.
15f) Follow instructions here to pop off the center console. Just fast forward the video. There are only 2x 7mm bolts you need to undo. Don't go crazy dismantling the top of the dash.
15g) On the bottom of that control panel, there is another smaller panel you can feel more comfortable cutting a hole in. It's also pretty easy to remove, once you're there. You can put your connector wherever you want, I just thought this cheap part would be a good option, and it had enough room behind it.
15h) Install the thru-hull here. 20-20 Hindsight. Mount it 180 degrees rotated relative to how I have it pictured. That will make it easier to unplug the cable when you want to.
15i) Put another RJ-45 end on the cable and plug it into the thru hull and reinstall the trim panels.
16) Reinstall the passenger side rear trim panel, and other trim pieces we removed, and fish/connect all the wires and stuff. I think there were 3 factory plugs to re-connect, plus our coaxial wire (through the grommet) and our RJ-45 end.
17) Trim the coaxial cable to length. Note: you want enough free cable to make removing the panel in the future easy, but not so much that you have a coil of it. Coils will actually mess up your radio's transmission. Put on a new PL-259 connector. Solder the tip, and crimp the other end. This might take some practice or other youtubing to learn how to do. Test for shorts with a multimeter. If the tip is shorted to the barrel, you screwed it up and need to start over. If not, you're probably fine. You might want to make sure you got a good contact on the NMO connector side on the outside of the vehicle too, just to be sure. Shrink tube over the crimp really makes it look nice. I hope you slid the shrink tube on the wire before you crimped it!
18) Connect all the wires and mount the radio. Use the 12V socket for easy power. This appears to always have juice. Alternatively, you can use the AUX switches and wire something up, but in ford's infinite wisdom, you cant power something in the rear of the vehicle and also have something powered on the roof. DERP.
18a) Make a ~12" cat5 patch cable, to connect the radio to the thru hull.
19) Go back to the driver seat, and plug in the microphone to the underside of the control panel in the center console, where we installed the thru-hull.
20) Mount the mic/speaker shoe on the dash somewhere (or don't, Idk, that's up to you). I drilled 2 small holes in it and fed the screws through, since I don't trust that adhesive tape. I figured the gray trim piece on the dash was pretty safe, and if the next guy really wants to fix those holes, its a smallish part of the dash to replace.
22) Read the manual if you want to change where the radio speaker plays through (you can set it to the head unit or the mic/handle or both). You can also change the background color of the mic unit.
23) Breaker Breaker 0-5, this here Four Wheel Kyle, be prepared, drive safely, and wheel with buddies! Signing off!

Broncofly, IL21Bronco
Last edited by a moderator:
Aug 25, 2022